Families/New Children can be added to a center/site several ways.
- Through the center's new registration page- parents/guardians must add all detail and submit payment (in most cases) before their submission is sent to the center. The family would be approved into the center by a staff or admin user from the Home > Information, Registration tile or the Approval > Registration menu option.
- Once a family is in the system for a school, the option to allow parents to add new children can be enabled on the family portal (connect.schoolcareworks.com or family.daycareworks.com). One the child's detail is entered into the system the child will need to be approved into the system from the Approval > Child screen.
- The family or child can be added to the system from the admin side of the system (schoolcareworks.com or daycareworks.com).
To add a new family to the system from the admin side select the star icon from the home screen, then select the option to Add a new child.

This will open an empty child record. The first step in creating a family record is to add a child. The ONLY detail that is required to add a child is marked with an *. All of the other fields are not mandatory- it will be up to a center what is required when a staff or admin user manually adds a child to the system.
- Last Name
- First Name
- Date of Birth
- Start Date- date the child will begin at the site
- Enroll Date- date the child registered
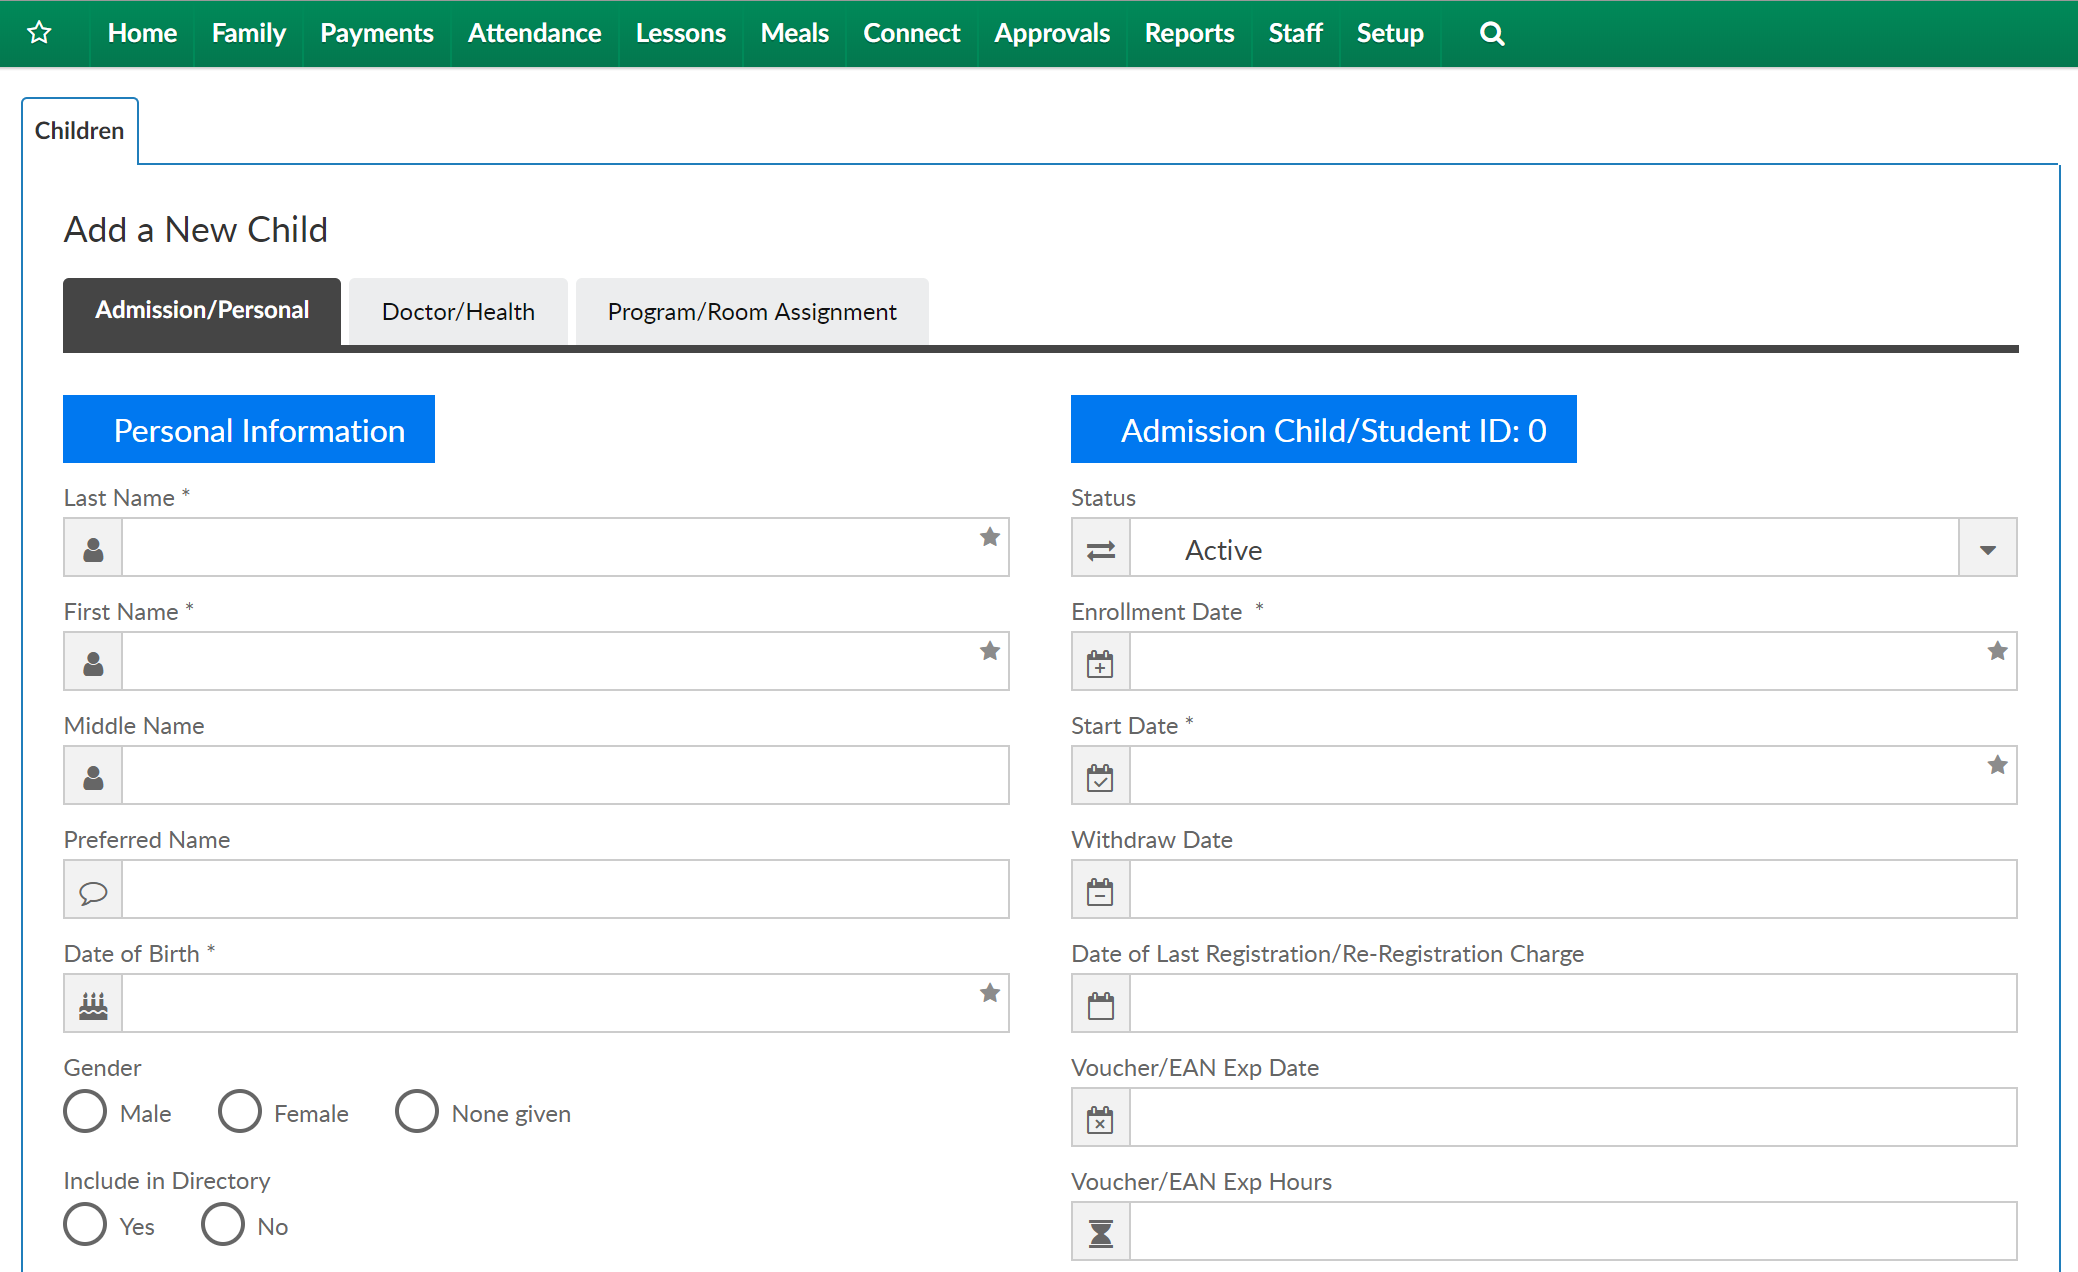
Once this information is entered into the system press Save.
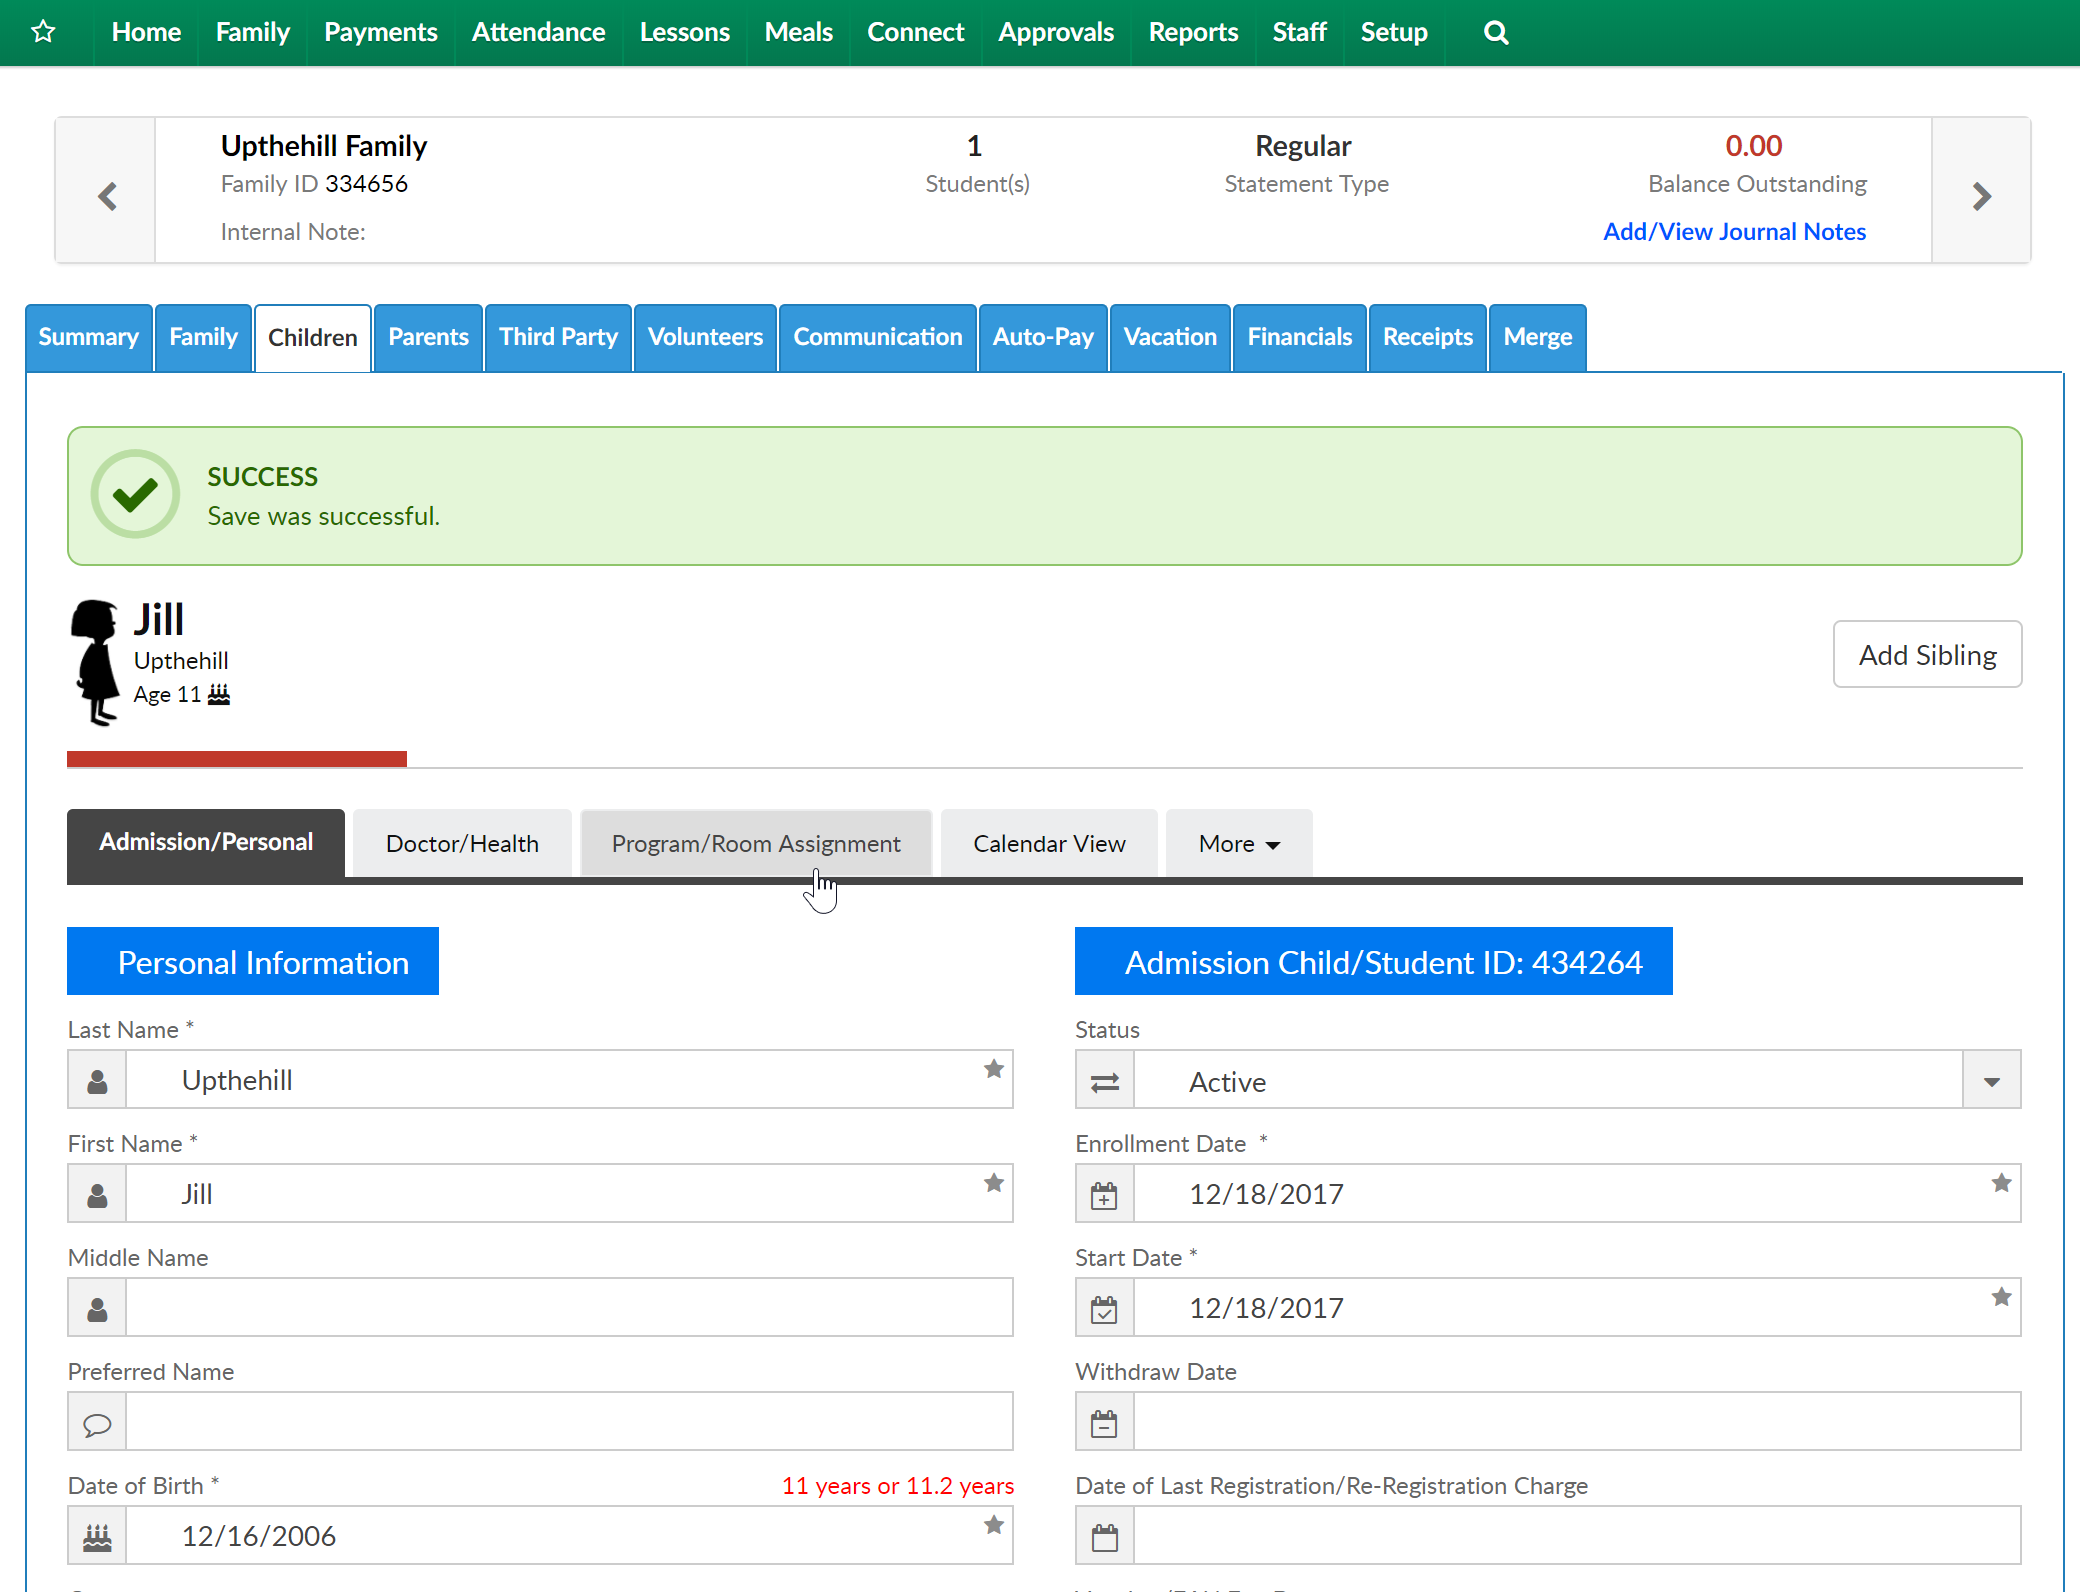
After pressing Save, the family record will expand and additional fields will display. The staff or admin user should enter available information to the Doctor/Health tab, add a program/room assignment for the child and add any Parent information on the Parent/Guardian tabs for Parent 1 and Parent 2. Be sure to scroll to the bottom of the page and press Save on each page before moving onto the next screen.
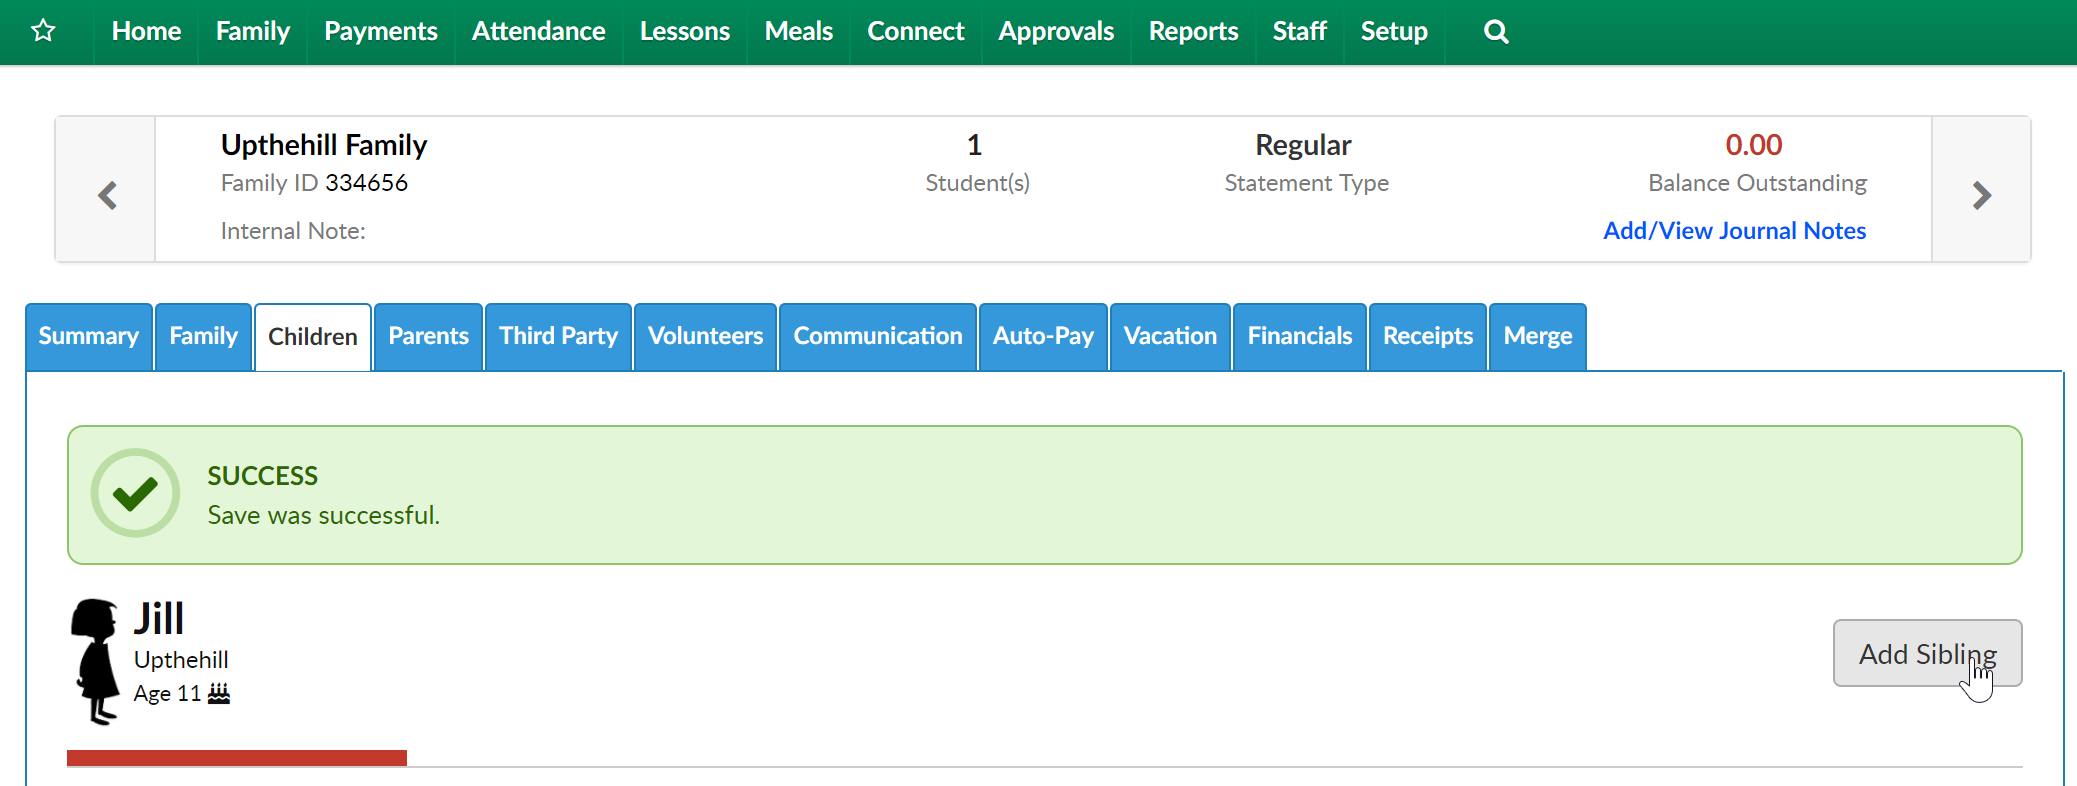
To add a child to an existing family select the Add Sibling button.
Enter required and optional information as available, then scroll to the bottom of the page and press Save.
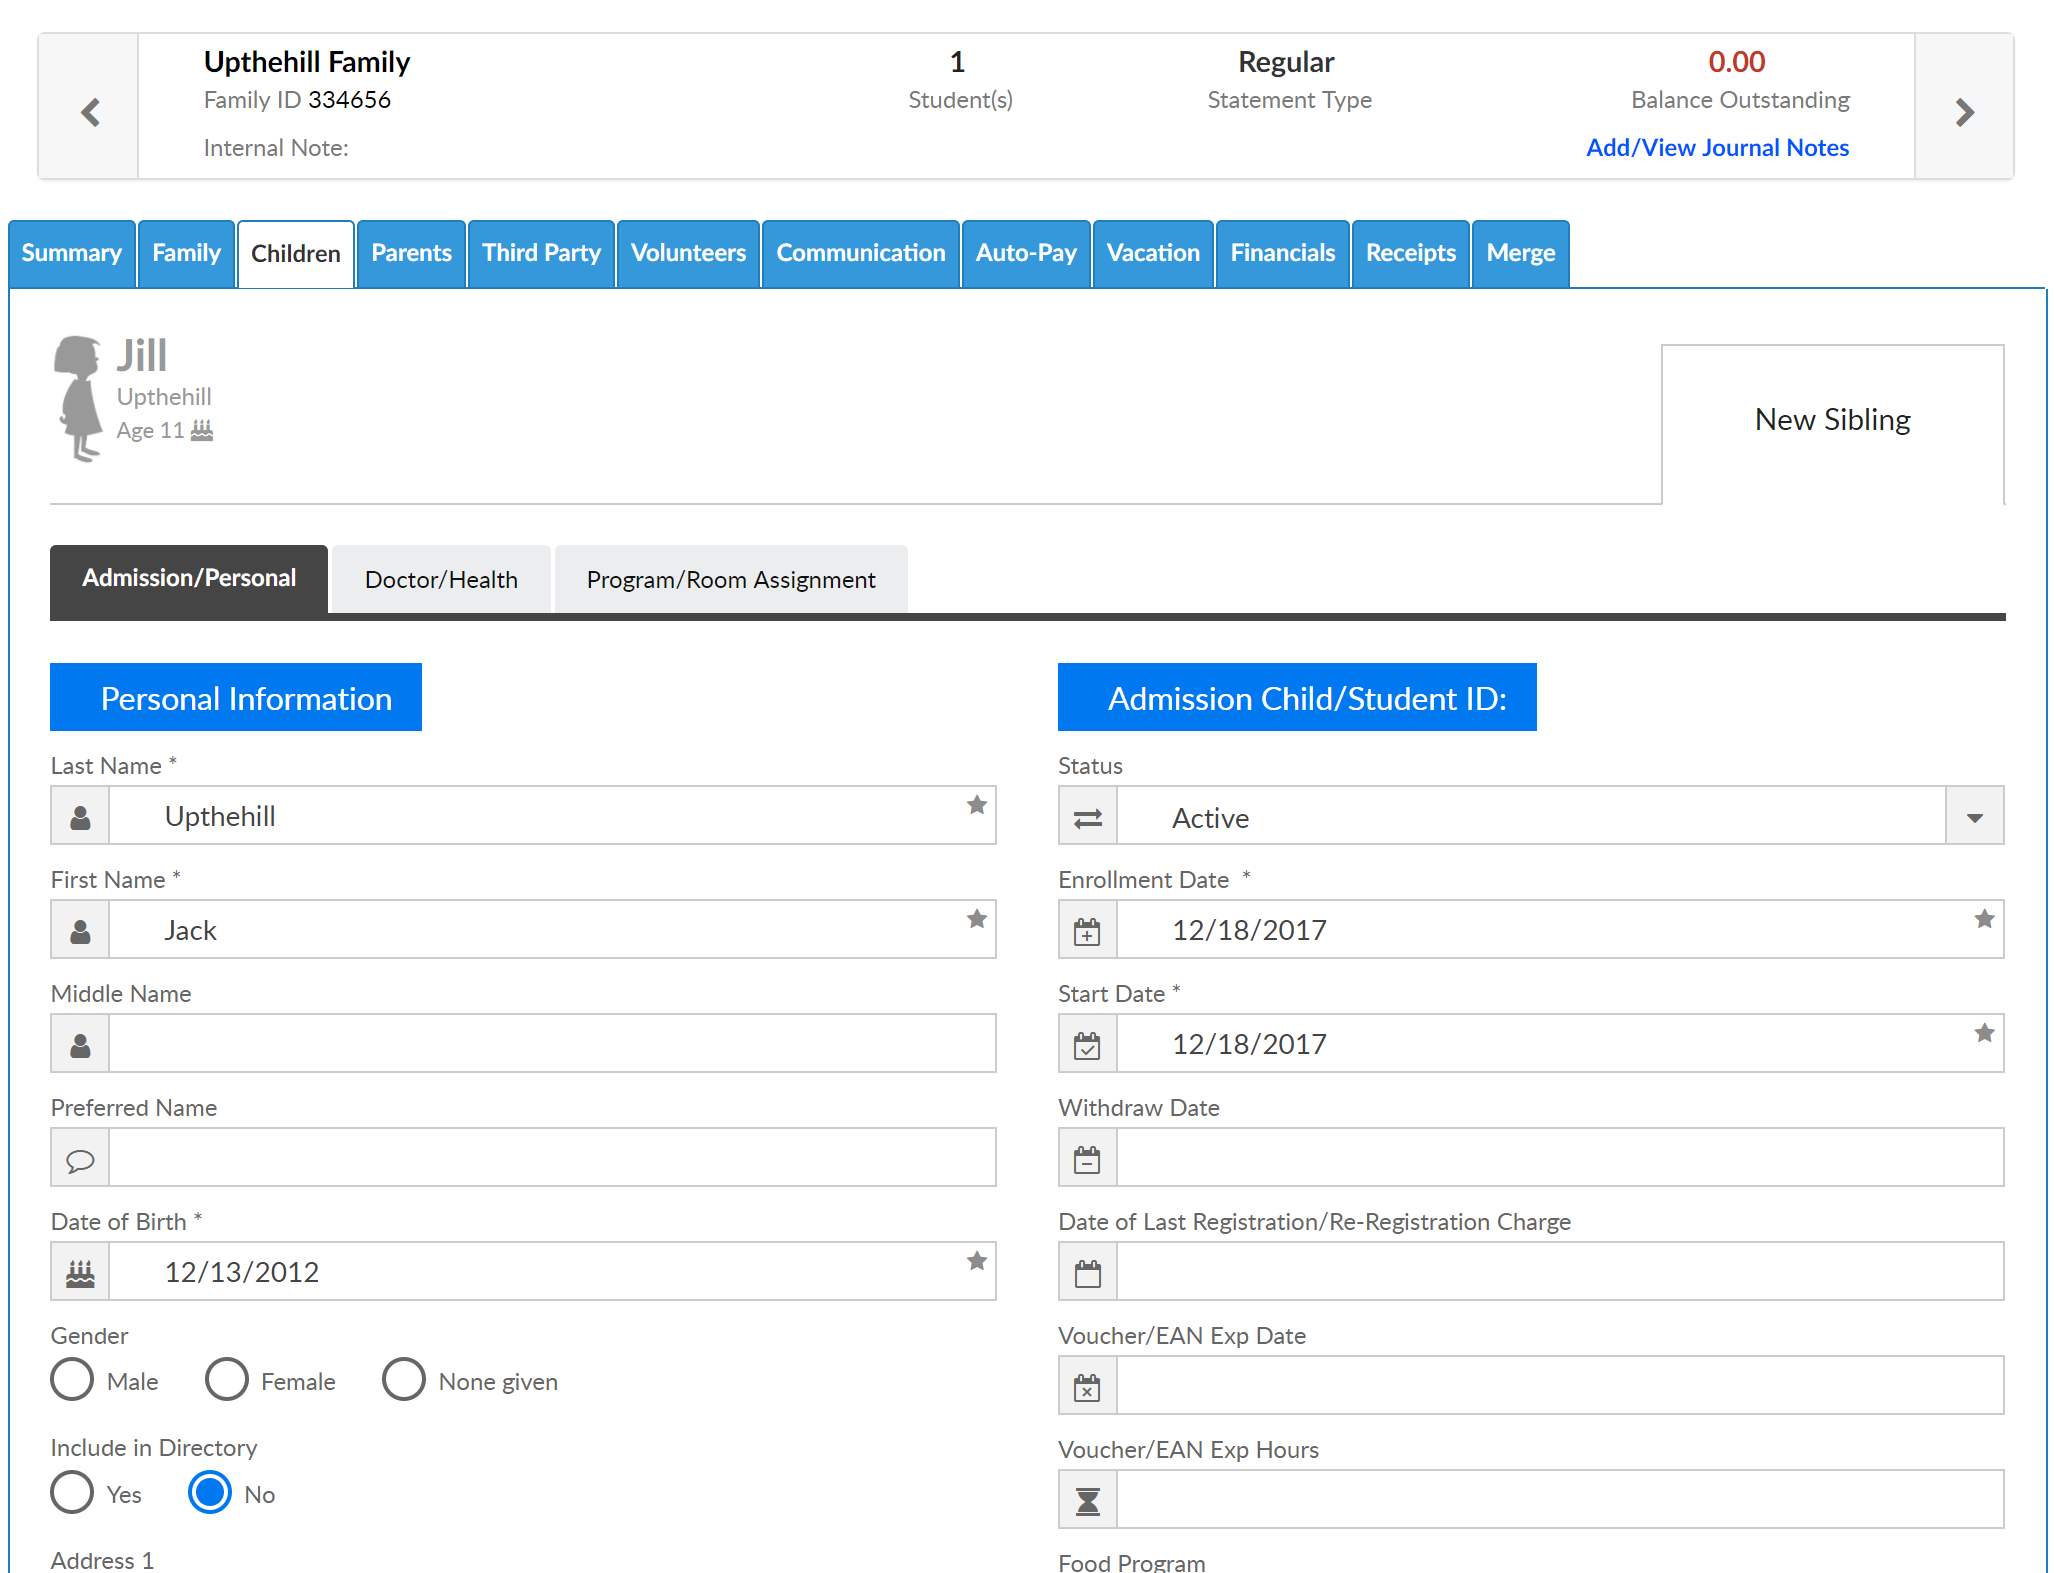
Once saved a confirmation box will appear and the new child will have an icon display next to the original child.
