Email templates are messages that are created by administrators and have the ability to be sent from the Connect > Communication screen.
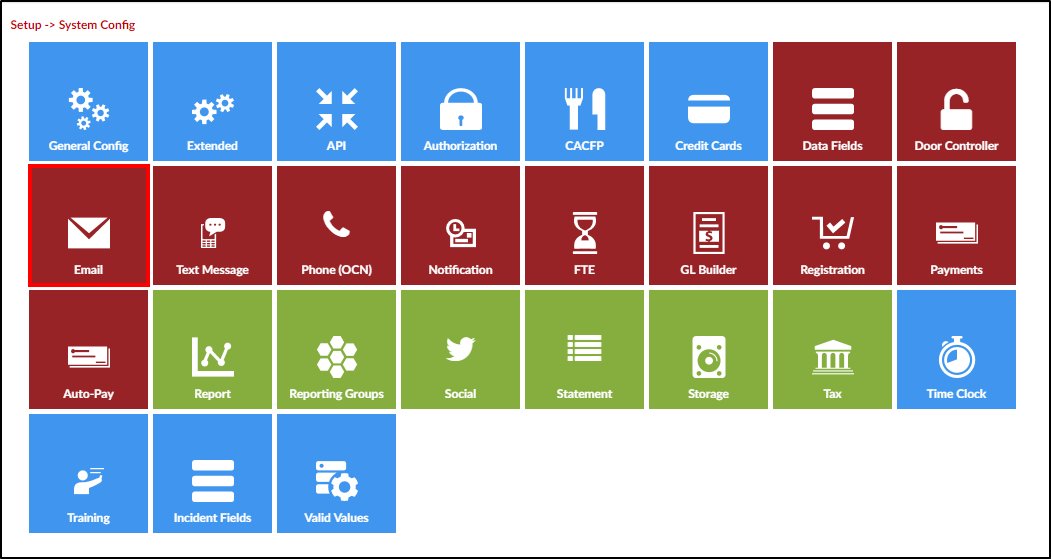
- Click Setup, then select System Config

- Click the Email tile
- Click Custom Email Template Types to create a new template or select an existing template to update from the drop-down menu (see available template types below)

- Complete the Setup Custom Email Template Types section
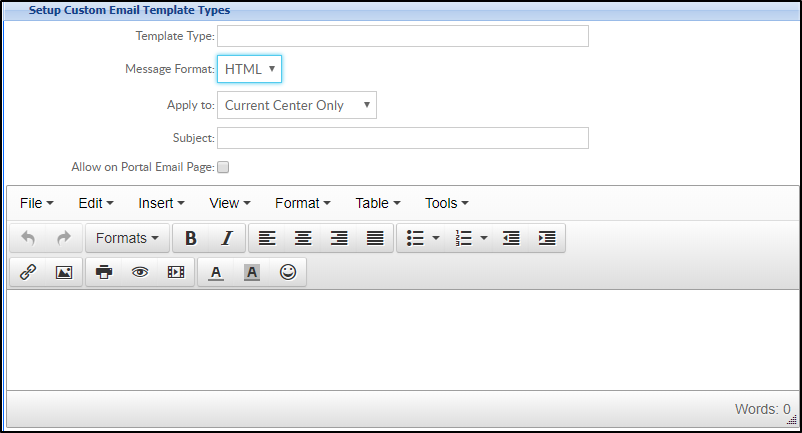
- Template Type - enter a name for the template
- Message Format - HTML (recommended)
- Apply to - choose a center from the drop-down or select All Centers
- Subject - enter the subject that should display to parents
- Allow on Portal Email Page - always select this option so the template can be sent from Connect>Communication
- Enter the message. To view sample email templates, click here
- Use the shortcuts on the right in the Shortcut Key section to customize the template
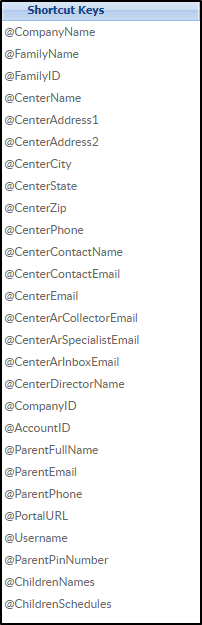
- Use the shortcuts on the right in the Shortcut Key section to customize the template
- Click Save


Template Types Currently Available
Below is a list of template types currently available in the system.
- Auto Pay Approval
- Auto Pay Rejection
- Child Note
- Family Statement
- Family Statement Reminder
- InSite Parent Welcome
- Late Pickup
- Missing Child Procedure
- Outstanding Balance - Fee Added
- Parent Portal - New Account
- Payment Failure
- Payment Return Notification (NSF)
- Payment Success
- Portal Registration Confirmation - Parent
- Registration Approval
- Registration Approval - Admin
- Registration Confirmation - Admin
- Registration Confirmation - Parent
- Registration Rejection
- Room Capacity Reached
- Schedule Change Request Approval
- Schedule Change Request Rejection
- Suspension Warning
- Unscheduled Attendance Fee
- Vacation Days Approved - Parent
- Vacation Days Rejected - Parent
- Waiting List Admin PRA Save
- Waiting List Approval
- Waiting List Entry
- Waiting List Rejection