The Payments > Payments/Adjustments screen allows users to search and display payments received in a particular period.
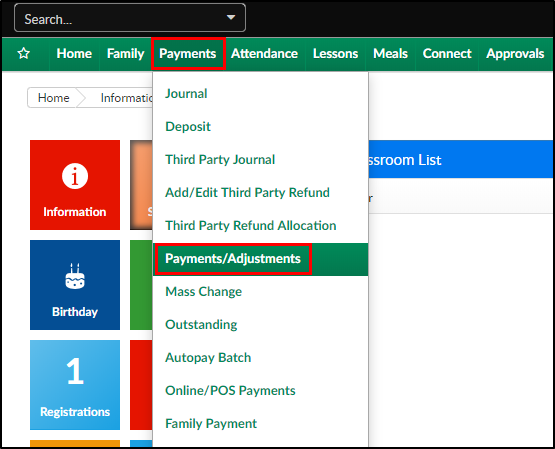
- Click Payments, then select Payments/Adjustments
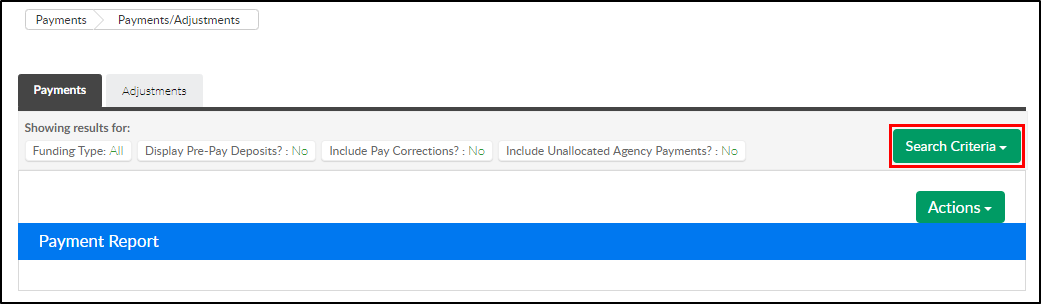
- Click Search Criteria to begin searching
- Select the search criteria as needed. Please Note: all fields are optional except for Entry Begin Date and Entry End Date
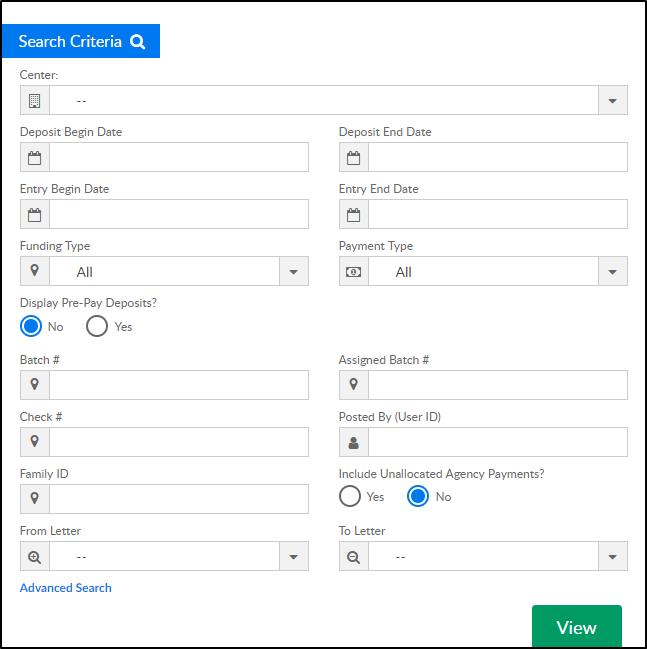
- Center
- Deposit Begin Date
- Deposit End Date
- Entry Begin Date - required
- Entry End Date - required
- Funding Type
- All - select All to view payments received by third party agencies and parents
- Copay/Parent Only - select this option to view parent payments only, excludes third party payments
- Select a third party agency from the list to view payments received by that agency
- Payment Type - choose from the drop-down to narrow results by payment type
- Display Pre-Pay Deposits? - select yes to include pre-paid deposits in the search results
- Batch # (Assigned by DCW/SCW) - enter a specific batch number, if necessary
- Assigned Batch # (Assigned by user on Batch & Report screen) - enter specific assigned batch number
- Check # - to search by a specific check number, enter the check number here
- Posted By (User ID) - to view only payments posted by a specific user, enter the user ID here
- Family ID - to narrow results to one specific family, enter the family ID here
- Include Unallocated Agency Payments? - if there are payments made by a third party agency that have not yet been allocated to a student, select yes to include those payments in the results
- From Letter
- To Letter
- Click Advanced Search to search by Brand, Division, and/or District
- Click View
- Search results will display in the Payment Report section
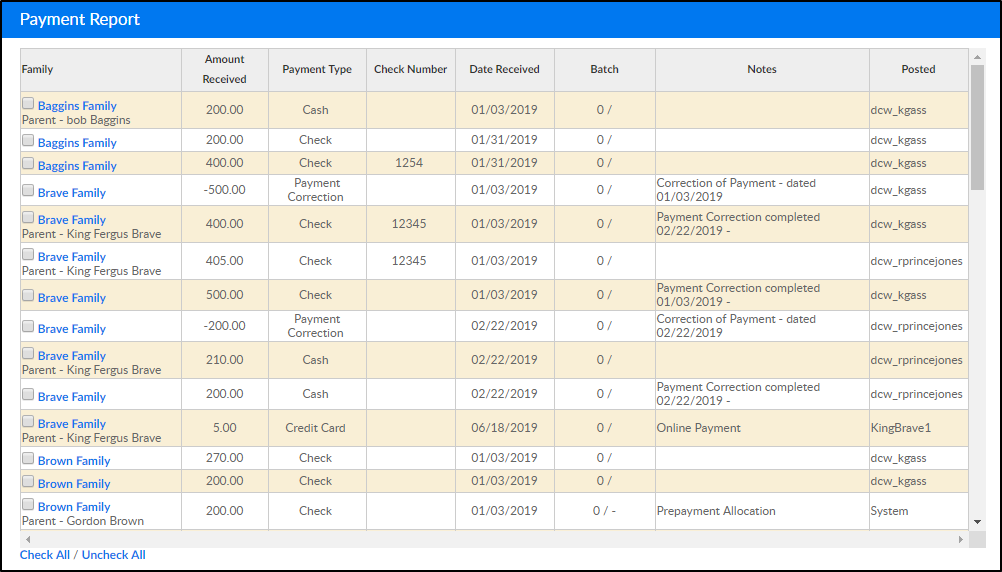
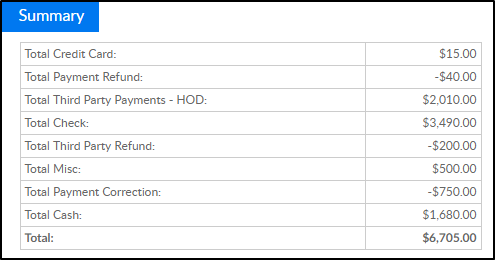
- A summary of the payments in the Summary section


Report Options
Click Actions to view a list of report options
- Payment Allocation Report - Allows users to see payments that have not been fully allocated. Use the Actions menu to open the report in Excel

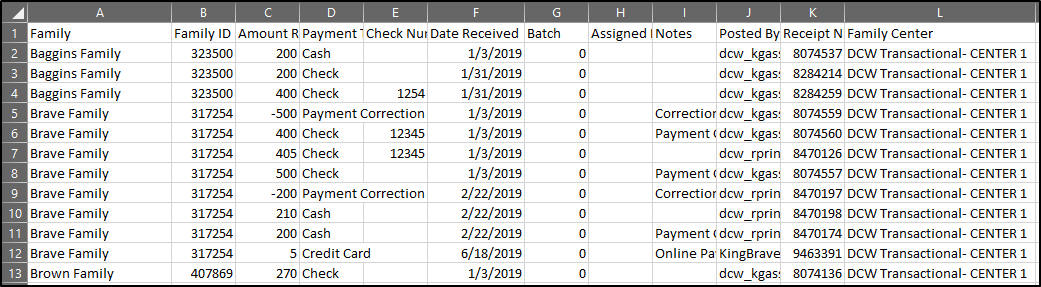
- Export - CSV- exports the displayed search results into an Excel spreadsheet
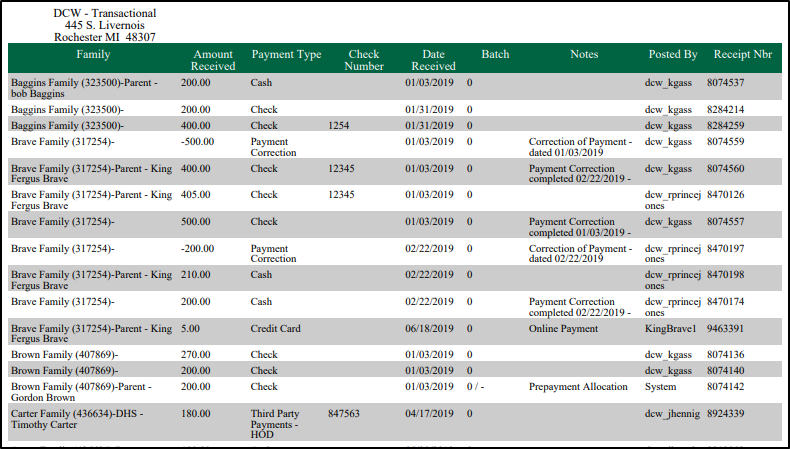
- Export - PDF - exports the displayed search results into a PDF format
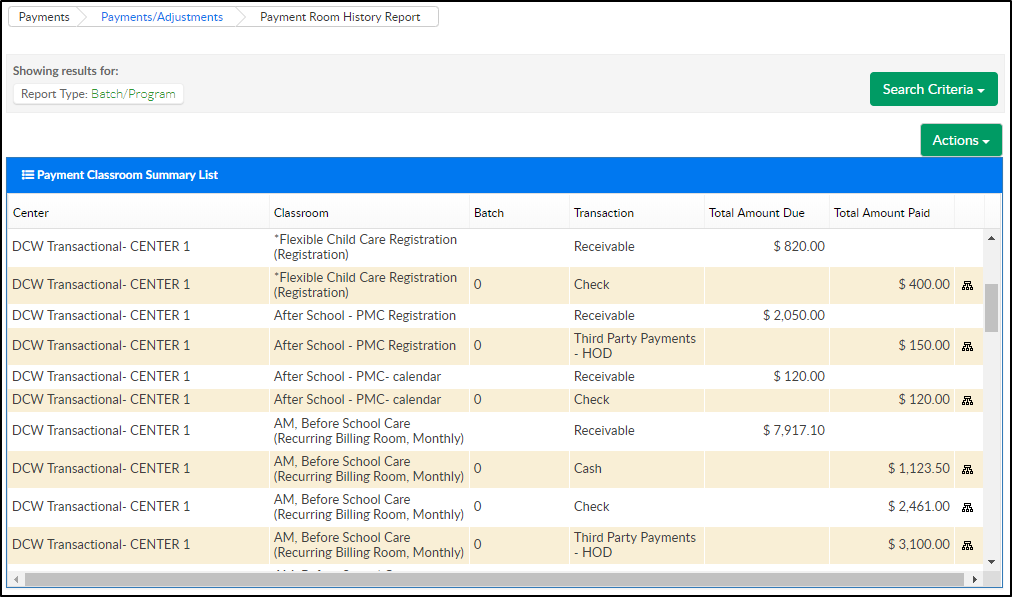
- Payment Program History - this screen displays a list of transactions, by center, then classroom
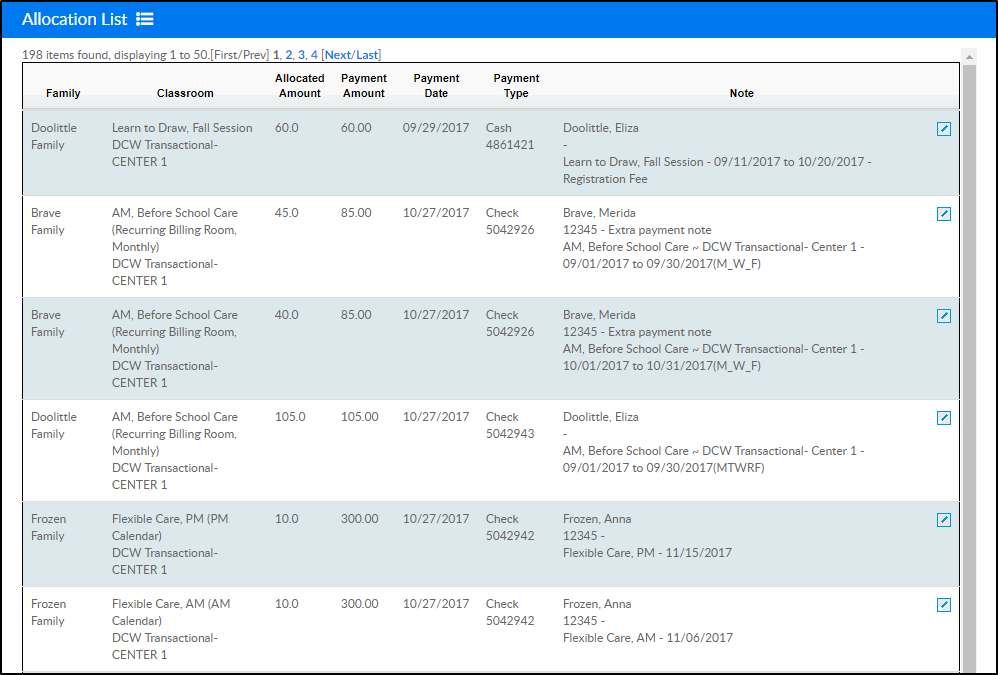
- Allocation Listing Report - displays allocations for payments. By clicking the modify icon, the system will be directed to the Reallocation screen to reallocate the payment. The Allocation Listing Report can be exported by clicking the Actions menu (Excel Grouped or Excel Flat) or scroll to the bottom (export via CSV, Excel, or XML)
- View Deposit Ticket- select the check boxes next to payments in the payment report list before selecting this option. Then, payments will display on a deposit ticket in PDF format for each payment that was selected

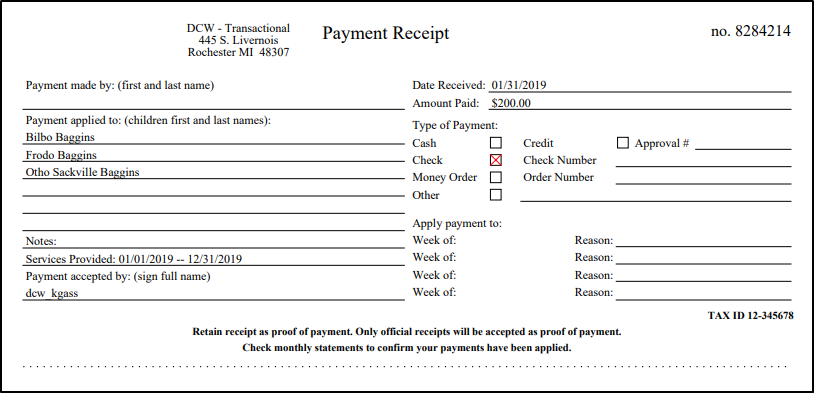
- View Payment Receipt - select the check boxes next to payments in the payment report list before selecting this option. Then, receipts will pull in PDF format for each payment that was selected