The Main Attendance screen allows staff to view attendance, check in or check out students/staff, mark students as present, or move students to another room. There are four different ways to view/filter students:
- Center - View all students within the center
- Category - View students within a category (Activity ID must be enabled – see below)
- Grade - View students within a specified grade (Activity ID must be enabled – see below)
- Room - Show only students within a selected room/program
Activity IDs
The Main Attendance screen has three activity IDs that must be enabled prior to viewing the screen and utilizing all available filters:
- 1808: Main Menu - Main Attendance – this Activity ID must be enabled for the Main Attendance screen to be visible. This activity ID also allows users to utilize the default student filters: Center and Room
- 1819 : Main Attendance – Attendance Option – Category Filter – this activity ID allows users to filter students by Category
- 1820: Main Attendance – Attendance Option – Grade Filter – this activity ID allows users to filter students by Grade
Viewing Students/Staff
To view student and staff attendance, follow the steps below:
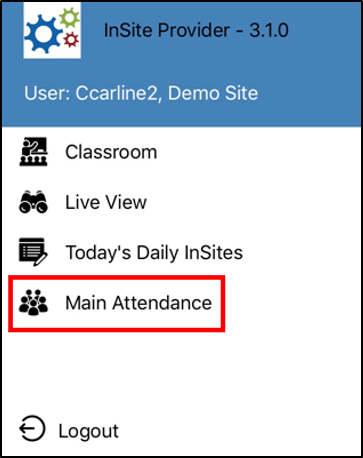
- Click the Menu icon
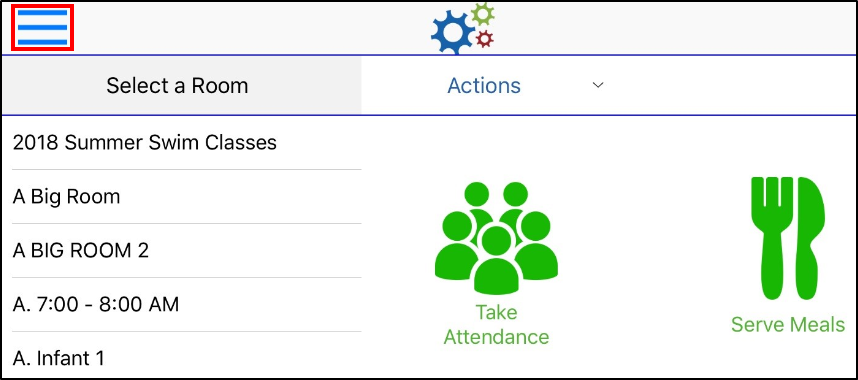
- Select Main Attendance
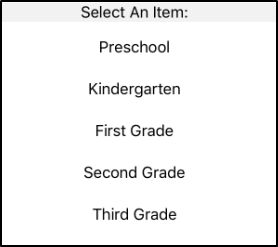
- Under the Select Attendance Option section, select Center, Category, Grade, or Room

- If Category, Grade, or Room was selected, choose from the Select An Item list. If Center was selected, skip this step
- The appropriate students will display based on what was selected in steps 3-4
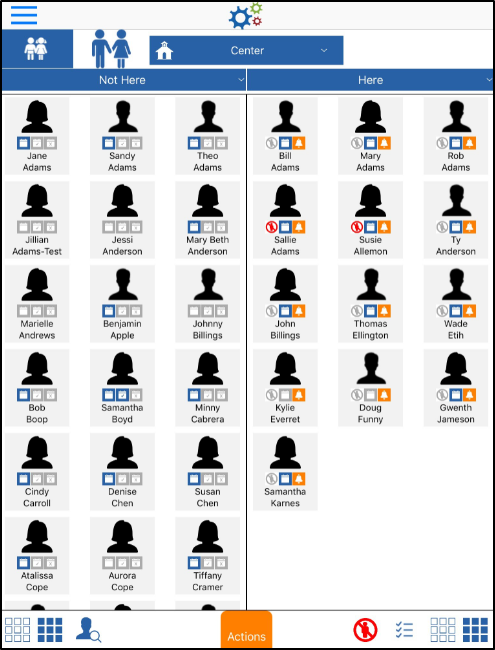
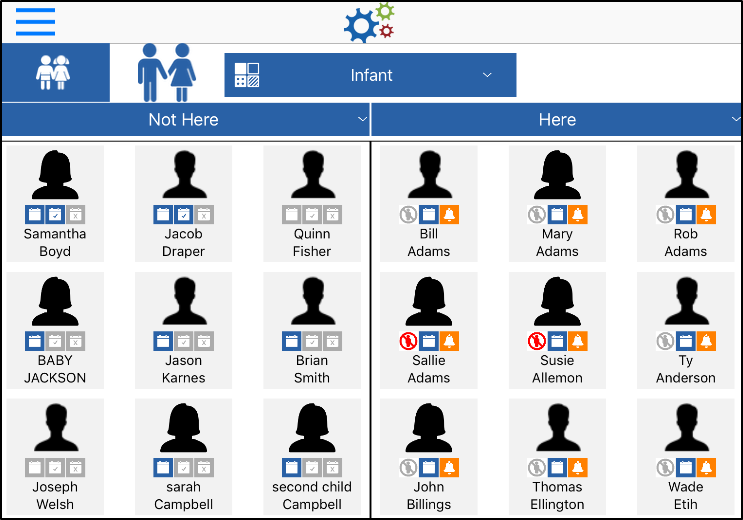
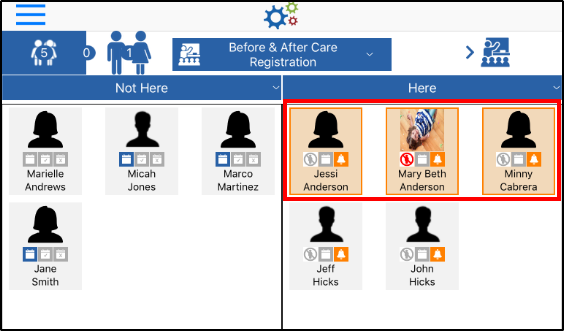
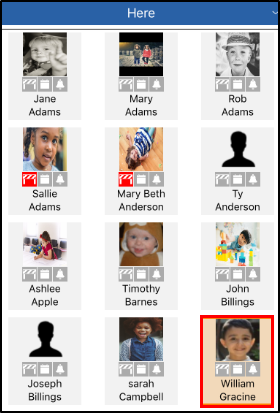
- To filter the students by attendance status (Not Here, Both, or Here), click the drop-down menu highlighted below. Please Note: this title will be different depending on the options selected previously

- Select which students should display under the Show Persons section
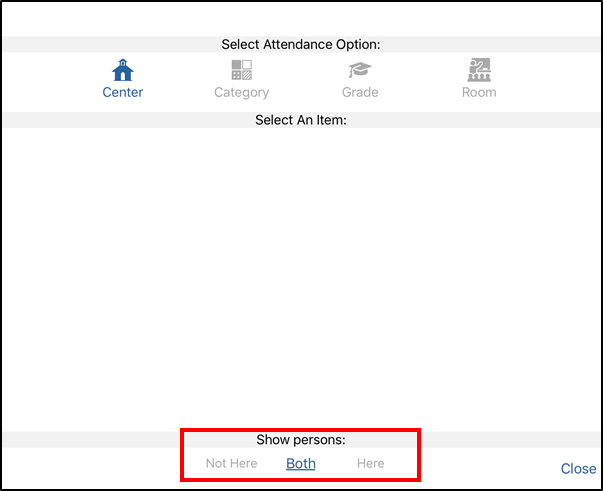
- Not Here – this option only displays students not currently checked in
- Both – all students will display (checked in and checked out)
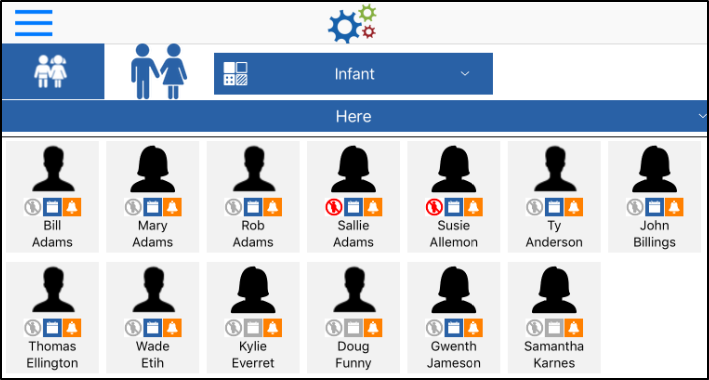
- Here – only students currently checked in will display
- Not Here – this option only displays students not currently checked in


Key Point: To quickly check in/out multiple students, select all necessary students from the Not Here or Here column and drag them to the opposing column.

Additional Main Attendance Screen Options
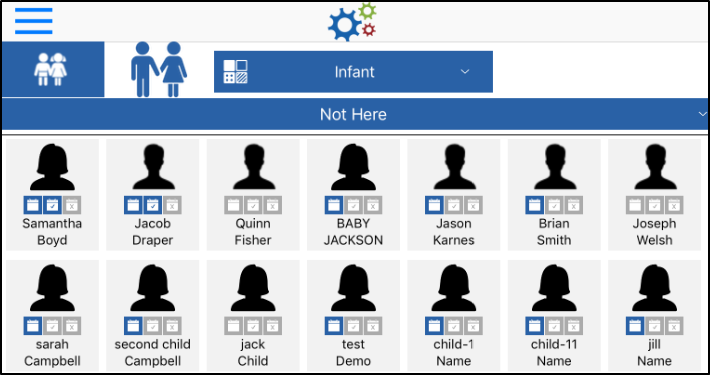
- Toggle between the staff and student lists by clicking the appropriate icon:
- When the left icon has a blue background, students are being displayed
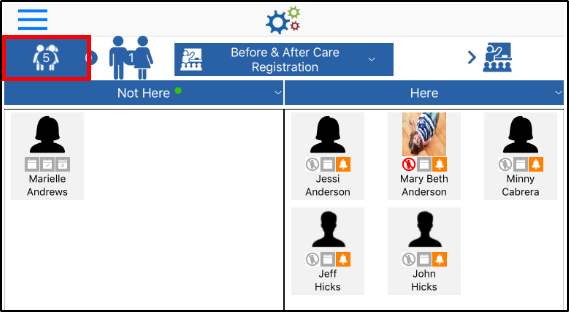
- When the right icon has a blue background, staff is displayed
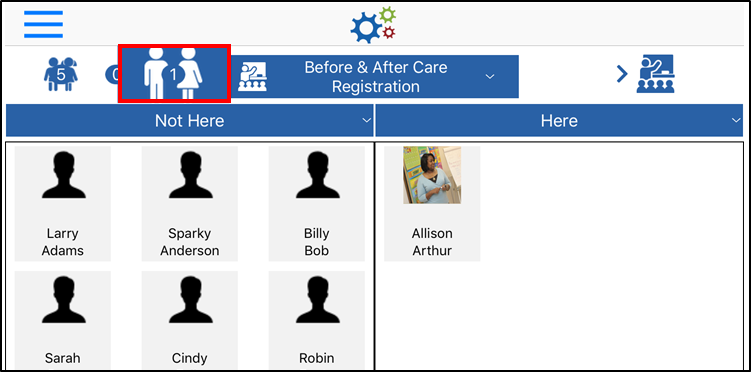
- When the left icon has a blue background, students are being displayed
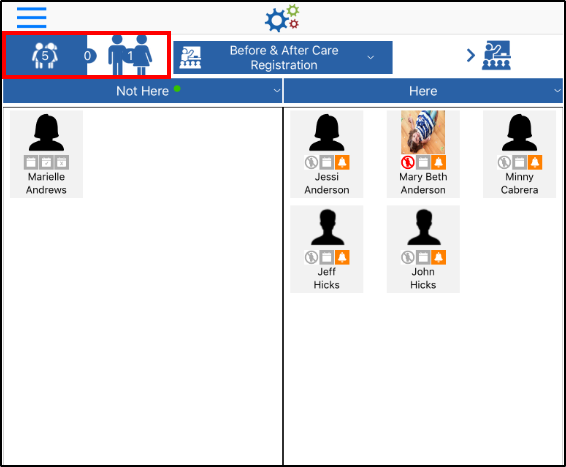
- When the Attendance Option is set to Room, and a room is selected, the student/staff ratio displays in the top left corner of the screen. In the example below, there are currently 15 students and 2 staff members checked into the selected room. The number between the student and staff icons represents the offset. Please Note: ratios can be setup on the room configuration screen
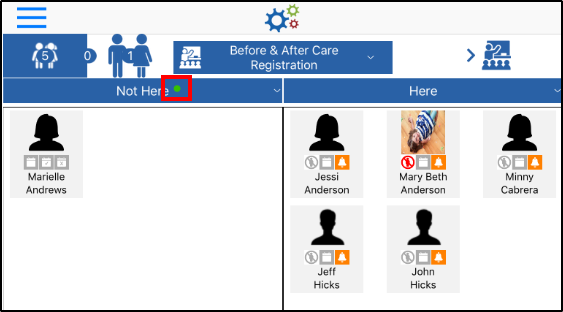
- On the Main Attendance screen, the “Not Here” student list can be filtered to show only students with schedules, without schedules, or both:
- Click the Not Here title
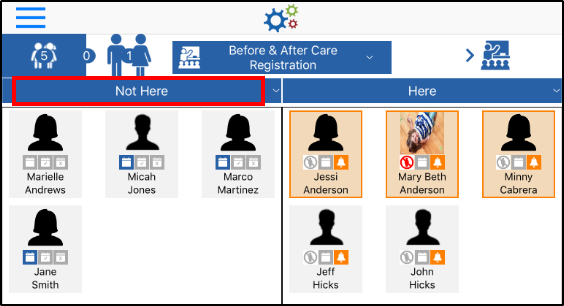
- Select the necessary filter option
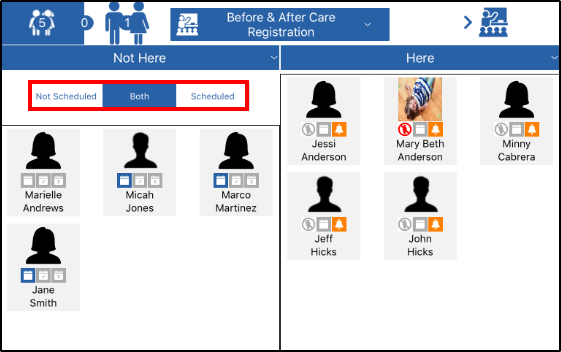
- Not Scheduled – only students without a schedule for the current day will display
- Both – all students, scheduled and not scheduled, will display
- Scheduled – only students scheduled to attend that day will appear in the list
- When the list is filtered, a green circle will appear to alert staff
- Click the Not Here title
- Select All/Deselect All – There is a Select All and Deselect All option at the bottom of the Not Here column and one set at the bottom of the Here column. This option allow staff to quickly check in all students/staff within a column

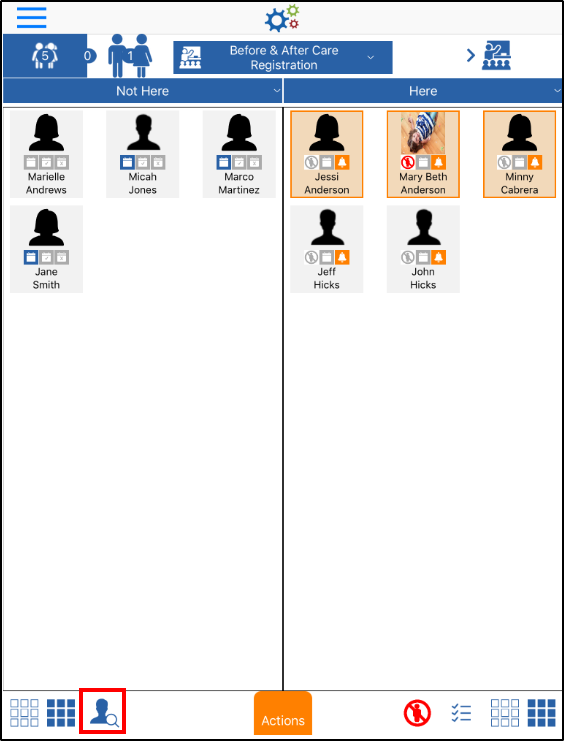
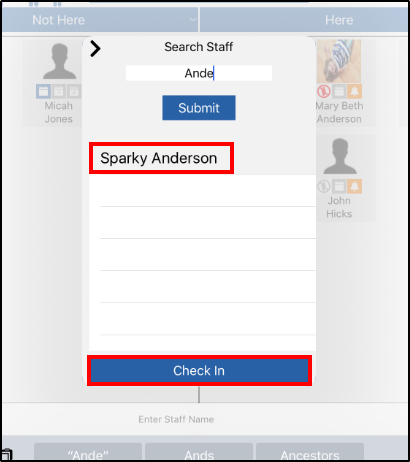
- Search Staff – The Search Staff feature is a quick way to check in staff members
- Click the Search Staff icon at the bottom of the screen
- Search for the staff member by full or partial first or last name and click Submit
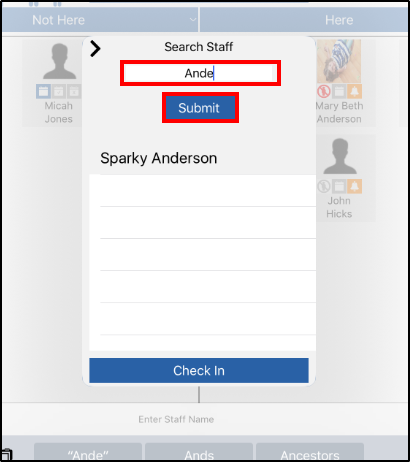
- Select the staff member by clicking on their name, then click Check In
- Click the Search Staff icon at the bottom of the screen
- The Actions menu is a quick and easy way to check students/staff in or out at a specified time
- Select the students or staff to check in/out
- Click the Actions menu at the bottom of the screen

- Select the correct time and click Check In/Check Out, Present, or Move
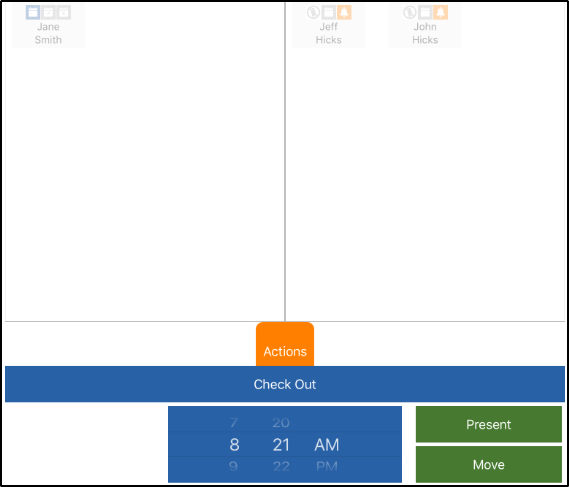
- Present – this option marks the student as present in the room
- Move – move students or staff to other rooms
- Select the students or staff to check in/out
- A confirmation screen will appear, click OK


Select Options
The Here column displays a list of students currently in the selected room. Use the Select Options icon to view where the students were initially checked in to, if applicable.
Please Note: The Select Options will only list the original room the student was checked into, it will not list the movements of the student throughout the day.
For Example: If a student was checked into "Room A" and moved to "Room B", then "Room C", the Select Options would only show "Room A".
Follow the steps below to view or move students to their original room:
- From the Main Attendance screen, select the center, category, grade, or room you wish to view
- Click the Select Options icon from the bottom of the screen

- A list of rooms will appear. Select a room to view the list of students
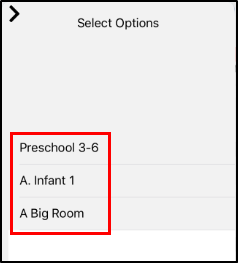
- Click the arrow button to confirm room selection
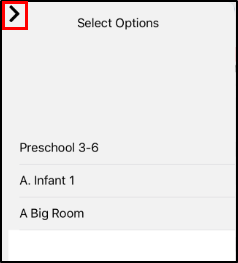
- All students that were checked in to the selected room will be highlighted. From here they can be moved, marked as present, or simply view the students from the selected room


Main Attendance Screen Icons
On the Main Attendance screen, there are 5 icons that appear. The chart below will describe what each icon means:
Icon | Description |
| Scheduled Today – the student is scheduled to attend |
| Was Here Today – the student attended that day |
| Absent – student is absent |
| Pickup Restrictions – the student has restrictions in the system on who can/cannot pick them up |
| Present Time Expired – the student has been checked in, but not marked as Present or it has been over 30 minutes since student has been marked as Present |