In the General screen displays center information, location, license, CACFP detail, and more,
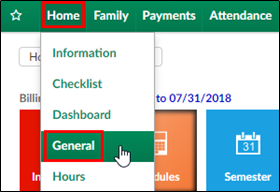
- From the navigator bar, click Home and then select General
- Listing Information
- Center ID - this ID is auto generated by the system and will not be displayed anywhere else
- Center Name - enter the name of the center or site. Please Note: This name will appear on statements sent to families
- Internal Center Information
- Internal Center ID - the identification used internally by the center
- GL Accounting Code - enter the general ledger accounting code. This field can be used when setting up the general ledger codes
- Payroll Center Code -enter the payroll code associated with a payroll center, if applicable
- Cost Center Type GL - enter the cost center general ledger code if the center, if applicable
- Rate Level - if the center is associated to a rate level, click on the blue i icon. The Rate Level section will not be displayed unless a rate level is setup in the Rates section
- Subsidiary/Brand/Division/District - select the subsidiary associated to the center, if applicable. The Subsidiary drop down list will not be displayed unless a Subsidiary is setup in the Valid Value section
- GL Department - if applicable, select the GL Department from the drop-down list. The GL Department drop down list will not be displayed unless a GL Department is setup in the Valid Value section
- Location information - enter the address of the center
- License Information
- License Number - enter the license information for the center. If multiple licenses are needed, use license 2-3 also
- License 2 number
- License 3 number
- Agency Account Number - enter the agency account number for the center
- CACFP Information
- CACFP Enrolled Important: This option must be set to Yes to track meals on the Meals > Entry screen and the InSite Classroom Serve Meals screen.
- Yes - the center is a member of the Child and Adult Care Food Program
- No - the center is not a member of the Child and Adult Care Food Program
- CACFP Account Number - enter the account number of the CACFP account
- CACFP Sponsor Name - enter the name of the sponsor associated to the CACFP account
- CACFP Sponsor Number - sponsors phone number
- CACFP Enrolled Important: This option must be set to Yes to track meals on the Meals > Entry screen and the InSite Classroom Serve Meals screen.
- Contact Information
- Center Email (appears with listing) - enter the contact email address for the center
- Phone Number - enter the phone number for the center
- Fax - enter the fax number for the center, if applicable
- Contact Name - enter the name of the contact at the center
- Contact Email - enter the contact's email address. This is the email that will be sent the student information changes and automated emails to administrators in the system
- Director Name - enter the name of the director of the center
- Assistant Director Name - enter the name of the assistant director, if applicable
- Office Coordinator Name - enter the name of the office coordinator, if applicable
- Area Manager Name - enter the name of the area manager, if applicable
- A/R Collector - enter the name of the A/R collector, if applicable
- A/R Collector Email - enter the email address if the A/R collector, if applicable
- A/R Specialist - enter the name of the A/R specialist, if applicable
- A/R Specialist Email - enter the email address if the A/R collector, if applicable
- A/R Inbox Email - enter the A/R inbox email address, if applicable
- General Information
- Center URL - enter the website address for the center. This is the website parents will be redirected to after clicking the Logout link from the Connect Portal
- Operating hours - enter the hours for the center
- Licensed Capacity - enter the capacity the center is licensed for
- Available Capacity - enter the total capacity available
- Age Range - enter the age range of students that can attend
- Center Type - select the type of facility the center is
- Corporate Center
- Employer Sponsor
- Franchise Center
- Developer Center
- Corporate Owned/Contract Based
- Home Based
- OP Code - enter the operation code, if applicable
- Profile - enter any profile information for the center
- Click Save

Actions Menu
There are several items in the Action menu, including:
- Export Facility Information - all business and center level details from the Home > General screen are exported into an Excel file
- View Center Documents - displays all documents that have been uploaded
- View/Add Licenses - allows users to view uploaded documents and license information
- Upload a Company Logo - allows users to upload a logo for a specific site/center
- Setup License - allows users to add license information
- License Tracking - view licenses within the center