The general ledger builder allows users to create short codes that attach to valid values. When this is done, the system can pull details for how a revenue or payment type valid value should be classified.
From the setup menu, select system config-
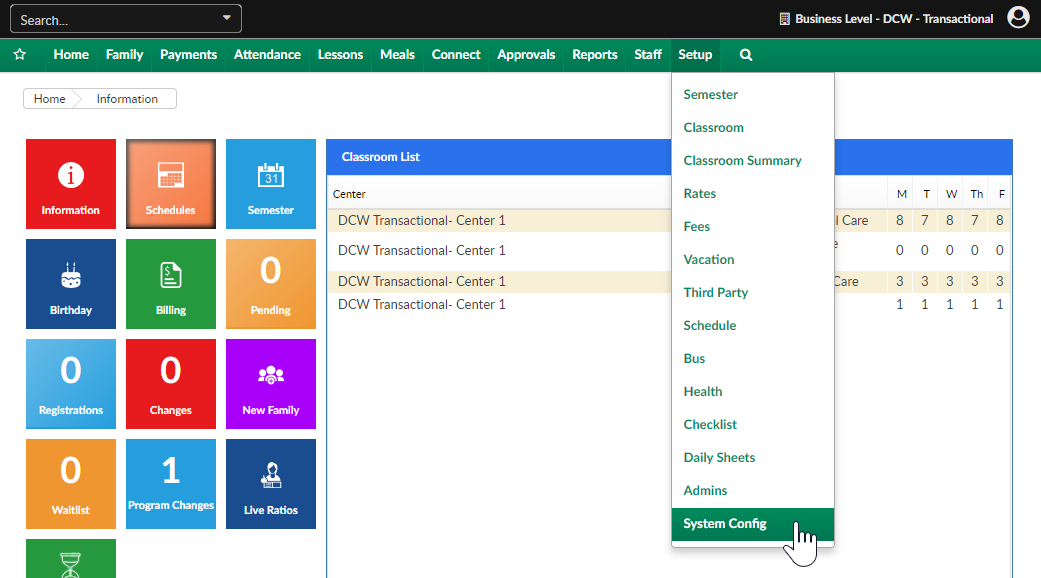
Then select GL Builder-

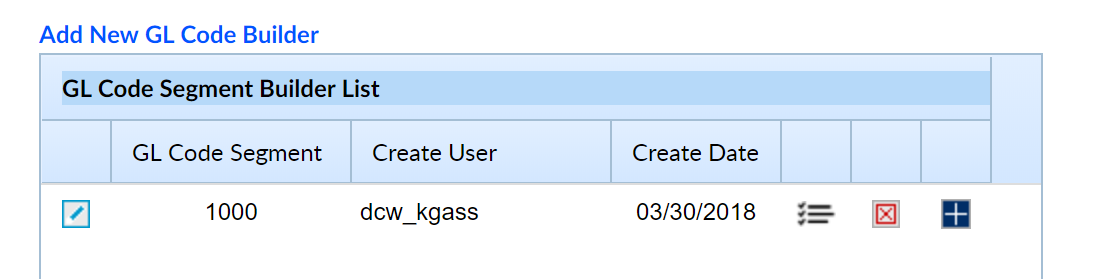
The GL Builder screen will display short codes that have already been created and allow users to setup new shortcut codes/account strings.

Step 1- add a GL Code Segment, then press Save GL Code-
This code will be a shortcut that you will place on a specific valid value to call for the segments you will build in the next steps.

The short code will display in the GL Code Segment Builder List-
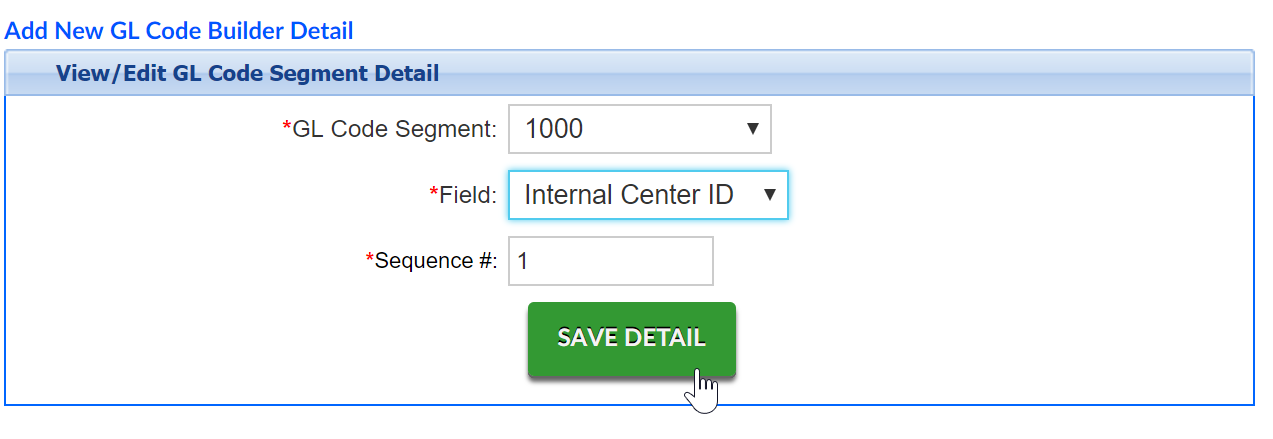
Step 2- To define what the short code means scroll to the bottom of the page and select the GL Code Segment, then select what type of field segment 1 should be. Save Detail.
The fields that display allow the system to pull an account number from a place in the system such as the room, room category, semester, rate etc. This means that your GL strings can be flexible.
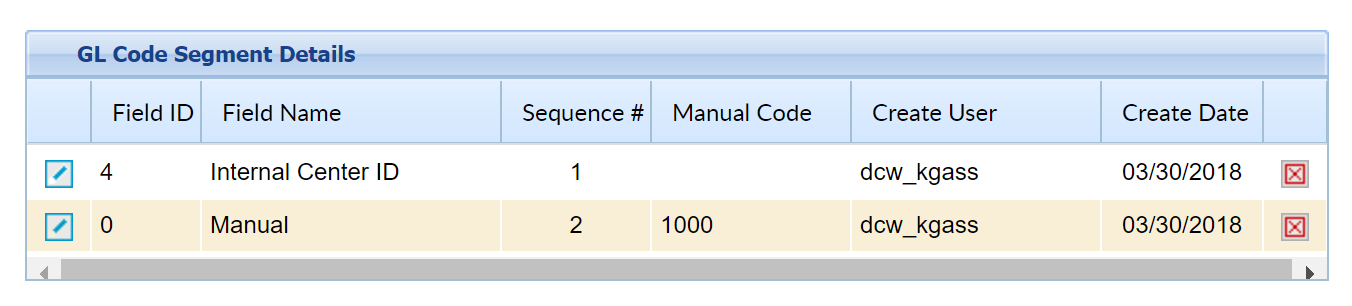
Select Manual to manually create a GL Code segment that will be attached to the GL Code. After selecting Manual, a Manual Code text box will appear that administrators can enter in the general ledger code.
Select Brand to attach the GL Code assigned to the brand in the Platform. The Brand GL Code is setup in the Valid Value section for the specific Brand. A Brand is attached to a center on the General tab for the center on the Home screen.
Select Division to attach the GL Code assigned to the division in the Platform. The Division GL Code is setup in the Valid Value section for the specific Division. A Division is attached to a center on the General tab for the center on the Home screen.
Select District to attach the GL Code assigned to the district in the Platform. The District GL Code is setup in the Valid Value section for the specific District. A District is attached to a center on the General tab for the center on the Home screen.
Select Center to attach the Internal Center ID assigned to the center or center in the Platform. If there is no Internal Center ID setup for the center, the Platform will attach the DCW ID associated to the center. The Internal Center ID is setup on the General tab for the center on the
Home screen.Select Rate Category to attach the GL Code assigned to the rate category for a rate in the Platform. The Rate Category GLs setup when creating a Rate Category, located in the Rate Category link on the Rates section in the Setup tab on the main toolbar.
Select Rate to attach the GL Code assigned to the rate in the Platform. The Rate GL is setup when created a rate in the Rates section in the Setup tab on the main toolbar.
Select Room Category to attach the GL Code assigned to a category in the Platform. The Room Category GL is setup when creating a Category in the Rooms tab in the Setup tab on the main toolbar.
Select Room to attach the GL Code assigned to the classroom or room in the Platform. The Room GL is setup when creating a Classroom in the Rooms tab in the Setup tab on the main toolbar.
Select Agency to attach the GL Code assigned to a third party agency or sponsor in the Platform. The Agency GL is setup when creating a third party agency in the Sponsor tab in the Setup tab on the main toolbar.
Select Facility to attach the GL Code assigned to a facility in the Platform.
Select Cost Center to attach the Cost Center GL Code associated to a Revenue Type Valid Value. The Cost Center GLs setup on the General tab for the center on the Home screen.
Examples-
If you want to pull in which center is associated to the billing being created, you could choose internal center ID as your field type. Then you would go to the home > general page and add your center identifier to the internal center ID field. This means that when the system bills out the internal center ID field will change based on where the revenue or payment is being allocated. Center 1 might be equal to 01, center 2 might be equal to 02 etc.
If your account number changes by type of tuition being billed, you could select the rate option from the field list- then under the setup > rate screen you would add the account number associated to each specific rate. When billing was created the system would look at which rate was being charged out to form the GL string.
The GL detail will display in the box above-

Continue adding segments until your GL string has been built out.

The string has been built out-
Example- If a GL string in your financial system is 01.1000
The first step would be to create a short code which will typically be a number between 3-5 digits something like 1000. 1000 might stand for a revenue account related to a tuition valid value.
Under the short code of 1000 segments can be added. This means that any valid value that is associated to 1000 will pull the GL string by the segments that are under the short code.
Short Code, 1000= internal Center id, 01 + manual, 1000
Segment 1 might be setup as internal center ID (found under each centers Home > General tab), Segment 2 might be set as room category (accounting code under the room category on the Setup > Room page). Whenever Tuition revenue is billed out or credited the associated string that will pull will display as Internal Center ID.Room Category Account Code.
Once your string has been built out you will need to associate your GL short code to a valid value. Go to Setup > System Config, Valid Values