Plan options allow for a business to set defined day packages for parents to select during registration.
For example, if a site has a program that allows students to attend a specific set of days, each of the below would be setup as a plan option under the room.
- Monday, Wednesday, Friday
- Monday-Thursday
- Tuesday-Friday
Learn how to setup plan options in this video demonstration.
Room Configuration
For Plan Options to work with a room, there is one option that must be set.
- Click Setup from the menu, and click Room
- Click on the room/program name
- Locate the Fixed Plan for all Days? option
- Yes - when a time is setup for the plan option, that time will be selected for all days
- No - parents choose a time for each day in that selected plan option


Category Configuration
- On the Category configuration screen, ensure Allow Multi-Select is set to No

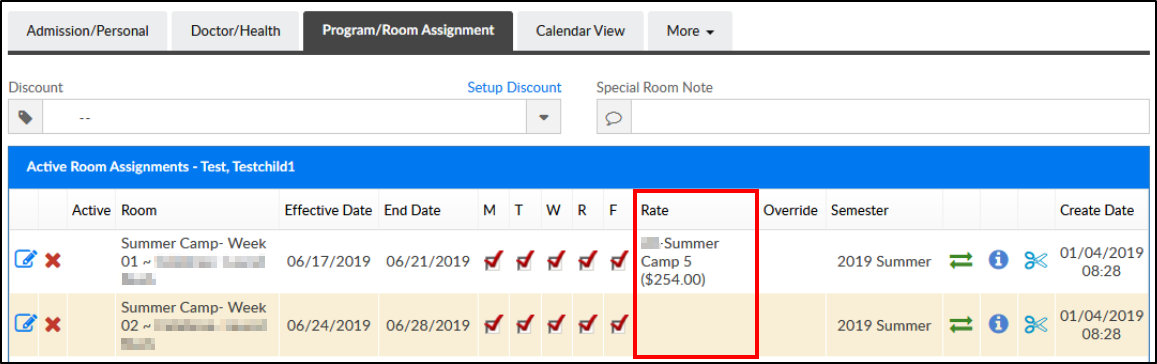
- If Yes is selected, a rate will not will not be placed in the subsequent Program/Room Assignments, see below


Creating Plan Options
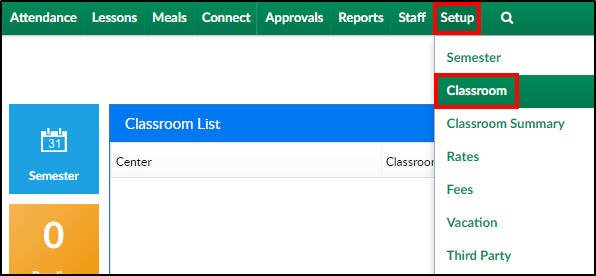
- Choose Setup from the menu bar, then select Classroom

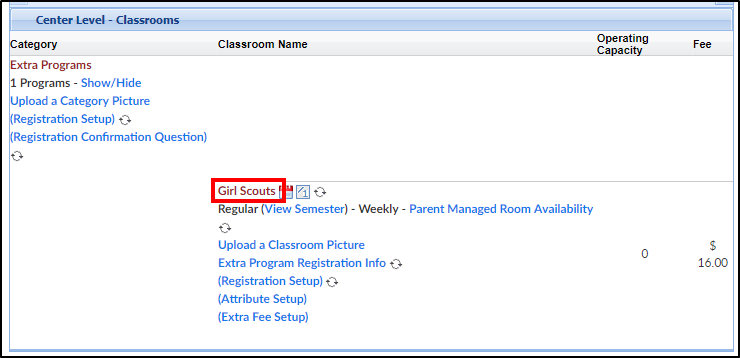
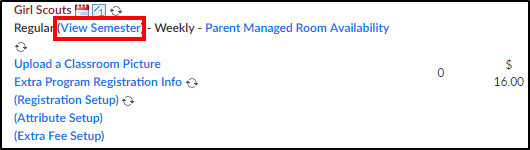
- Locate the room/program to add Plan Options to and Click View Semester
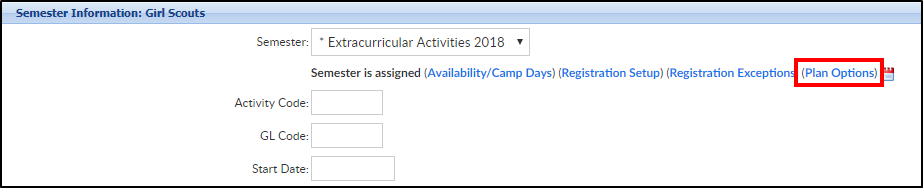
- Choose the Semester from the drop-down menu

- Click Plan Options
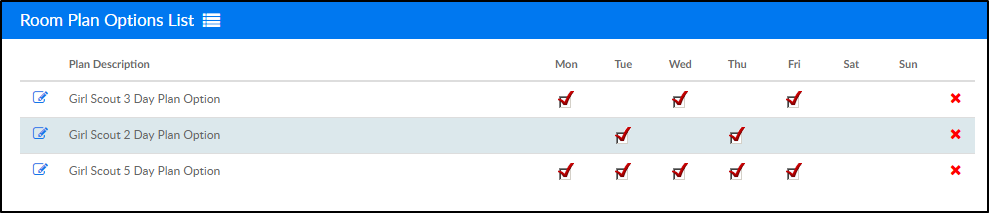
- Existing Plan Options will be listed under the Room Plan Options List section. Please be aware, plans are listed in the order they are added
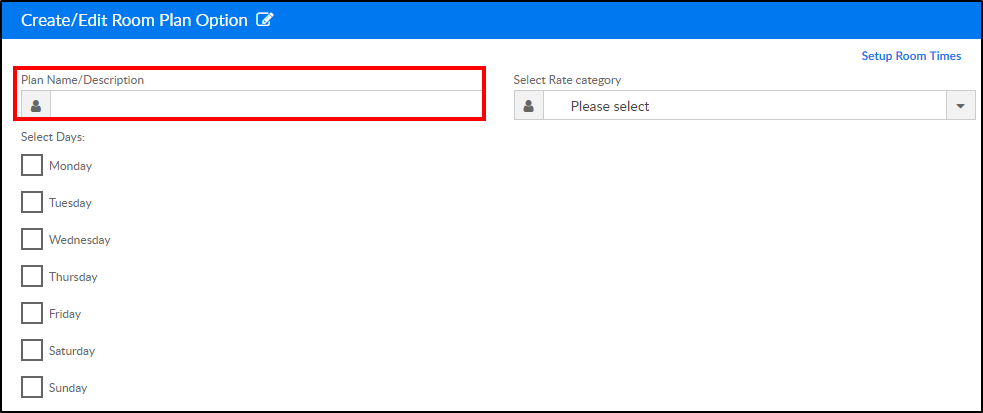
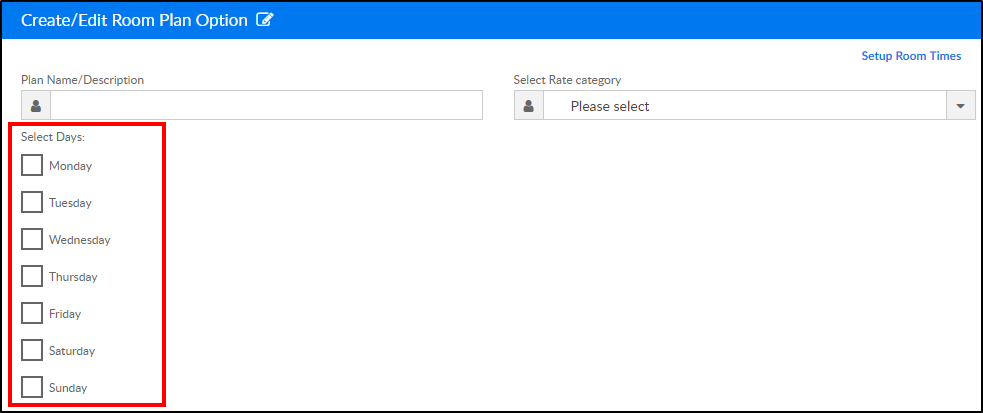
- To create a new Plan Option, complete the Create/Edit Room Plan Options section
- Plan Name/Description enter the name of the plan here
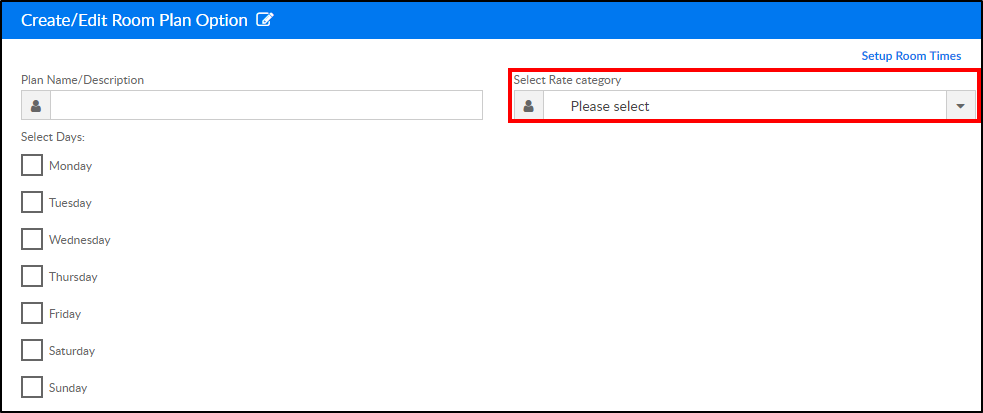
- Select the Rate Category from the drop-down menu (this is an optional field). Please Note: If a rate Category is not selected, the default rate at the room level will be used
- Choose the days to add to the plan option
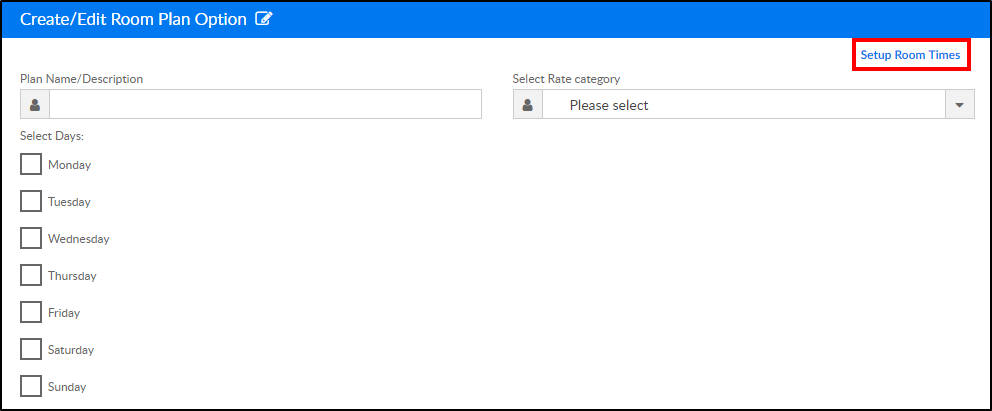
- Click Setup Room Times to add room times to the plan options (optional). Room Times can also be setup on the Room Registration Setup screen. Please Note: For times to display during registration, "Need Times for Plans" must be set to Yes on the Room Semester screen
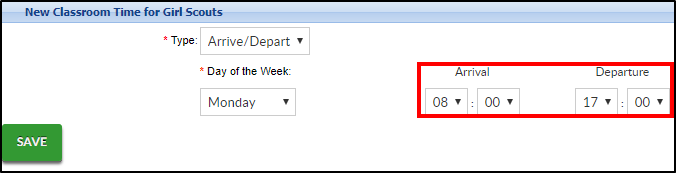
- Type - choose Arrive/Depart
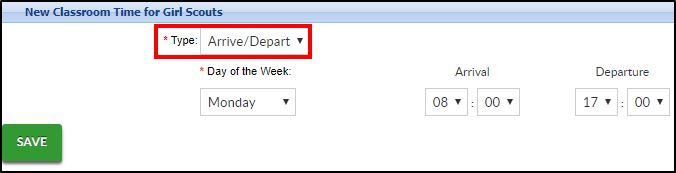
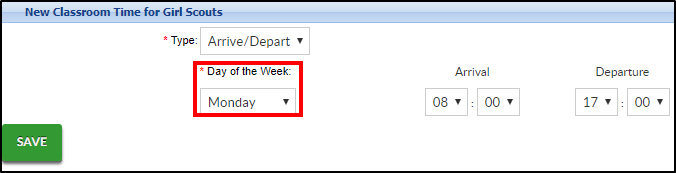
- Day of the Week - select the day to add a time to
- Arrival/Departure - select the arrival and departure times
- Type - choose Arrive/Depart
- Click Save
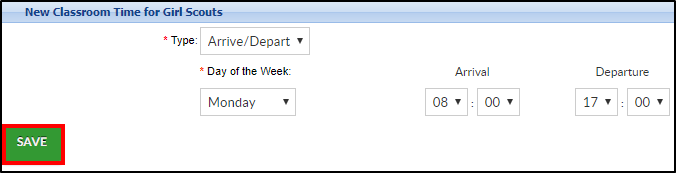
- Click Submit
- The following confirmation message will display. To add more Plan Options, complete steps 6-9 for each option


Setting Up Rate Categories
Each rate must be added to a unique Accounting Group before the rate can be associated with a Plan Option. Each Accounting Group must only have one rate associated.
To add an Accounting Group, follow the steps below:
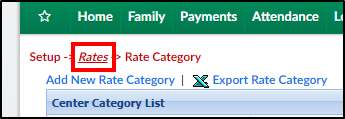
- Click Setup from the menu, then select Rates

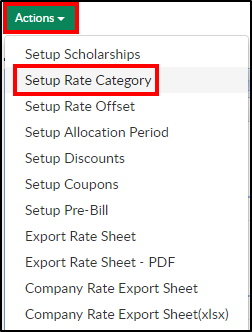
- From the Actions menu, click Setup Rate Category
- Complete the necessary fields in the Add/Edit Rate Category section
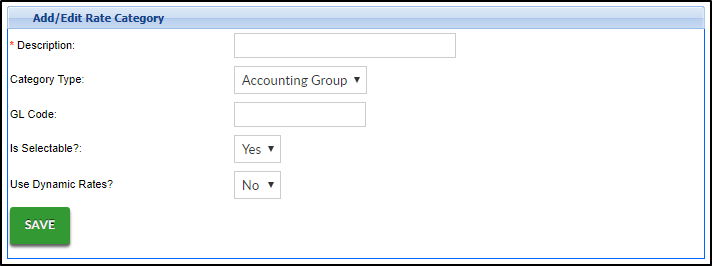
- Description – enter the name of the category group
- Category Type – choose Accounting Group from the drop-down menu
- GL Code – enter a general ledger code, if applicable
- Is Selectable? – choose yes to make it usable
- Use Dynamic Rates? – choose no for this category
- Click Save
- Navigate back to the Setup > Rates screen by clicking Rates in the top left corner
- Add the accounting group to an existing rate or create a new rate
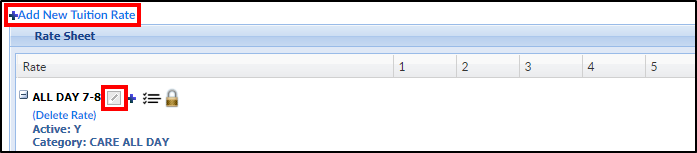
- In the Setup Tuition Rate popup, locate the Accounting Group drop-down. Select the accounting group created in steps 2-4
- Click Save
- The new Rate Category will appear in the Select Rate Category drop-down on the Plan Options screen


Please Note: If rates are setup at the center level, go to each center and associate the account group. This would be helpful if each center has a different rate for the same program. Programs, accounting groups, and plan options can be setup at the business level, then go to the center level to add the rates.
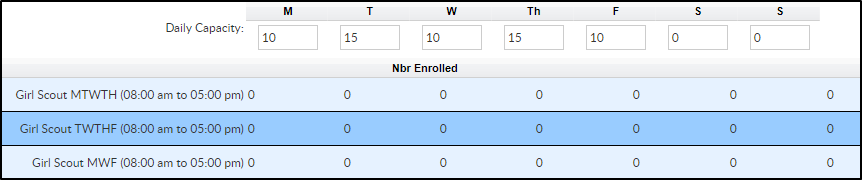
Capacity for Plan Option Rooms
When using Plan Options, the Daily Capacity section will be considered, not the Capacity field on the room semester screen. Enter the daily capacity for each day of the week and the chart will fill in as students are enrolled. Once the day hits capacity, registration will close for that day. Please Note: Enter zero for unlimited students
Parent Portal View
When parents are registering a student into a class with Plan Options, they will do the following:
- Log into the Connect Portal
- Click the Registration tile

- Locate the category and click on Click to View Offerings

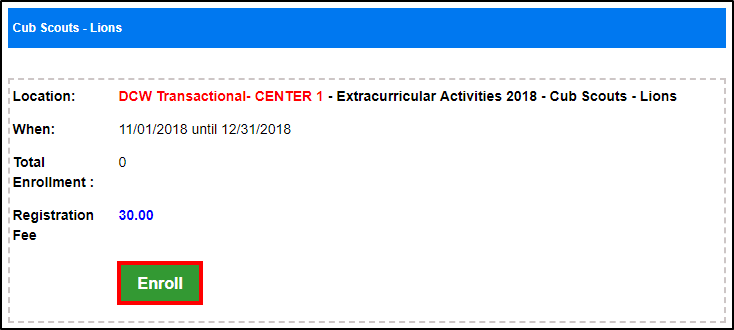
- Locate the program and click Enroll
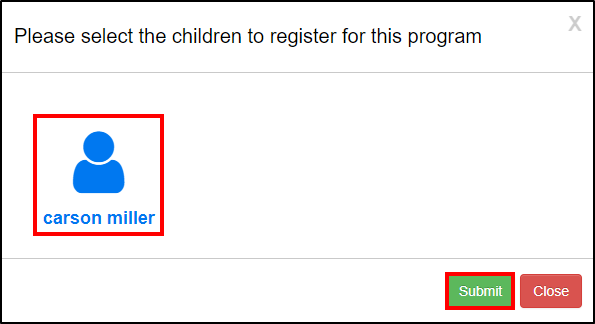
- Select the student and click Submit
- Select a plan from the drop-down menu

- Continue completing the registration form and click Add to Cart
- Once registration is complete and approved, if necessary, the program with the selected plan option days, will display on the student's Program/Room Assignment tab within the student's record


