The Documents/Checklist screen from the Children tab allows users to upload student-specific documents into the system. Administrators can create a list of required documents for students meeting certain criteria, such as the center they attend, age or grade of the student, etc.
For instructions on how to upload document into the student's record, click here.
To add student criteria to the document type, follow the steps below:
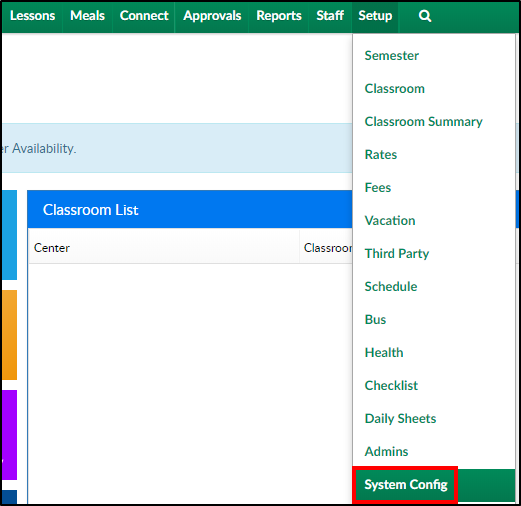
- Click Setup from the menu, then select System Config
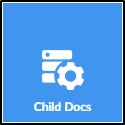
- Click the Child Docs tile
- The Document Criteria List will show a list of all documents added to the system

- Complete the Add/Edit section

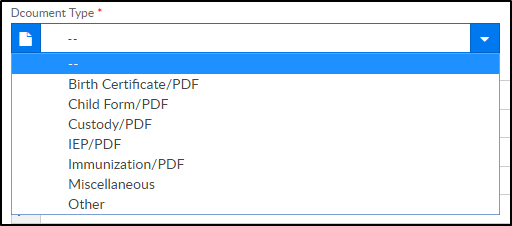
- Document Type (required) - choose from the drop-down (if more Document Types need to be added, see Add New Document Type - Valid Values section below)
- Upload Required
- Yes - uploading a document will be required
- No - an upload is not required, but a document can still be uploaded
- Allow Parents to Upload
- Yes - shows the document type on the parent portal
- No - hides the document type
- Document Type (required) - choose from the drop-down (if more Document Types need to be added, see Add New Document Type - Valid Values section below)
- Complete the Document Criteria section
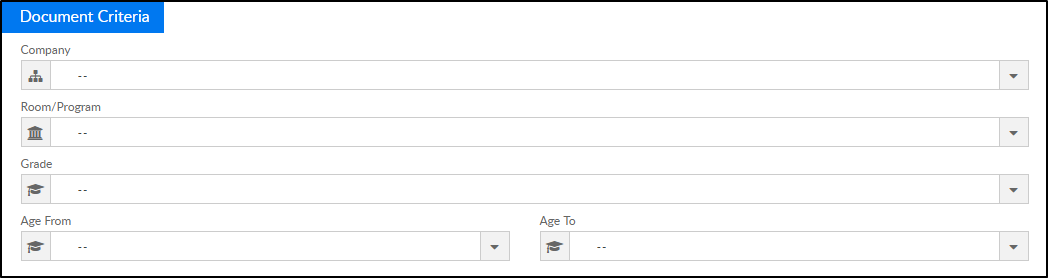
- Company (required) – select the center or business level from the drop-down. Please Note: If multiple, but not all centers need this document, a new document must be added for each center
- Business Level – if the document is necessary for all centers, select the business level
- Center – if the document is specific to a center, select the center from the drop-down
- Room/Program – select a room/program, if applicable. If a room/program is selected, this document will only appear for students within that room/program
- Grade – select a grade, if applicable. If a grade is selected, this document will appear for all students in the selected grade
- Age From/Age To – select a from and to age, if applicable. If there is an age selected, this document will appear for all students within that age range
- Company (required) – select the center or business level from the drop-down. Please Note: If multiple, but not all centers need this document, a new document must be added for each center
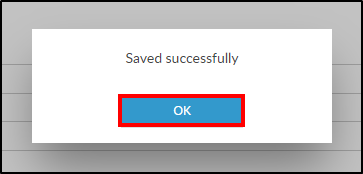
- Click Save
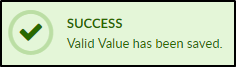
- The following popup will appear, click OK
- The new document will appear in the Document Criteria List above

- Click the
 icon to edit the document information
 - Click the
 to delete the document
- Click the


 icon to edit the document information
 to delete the document
Adding a New Document Type - Valid Values
There are 7 Document Types all centers will have preloaded into the system. If more Document Types need to be created, follow the steps below:
- Click Setup from the menu, then select System Config
- Select the Valid Values tile
- Scroll to the Valid Value section and complete the necessary options
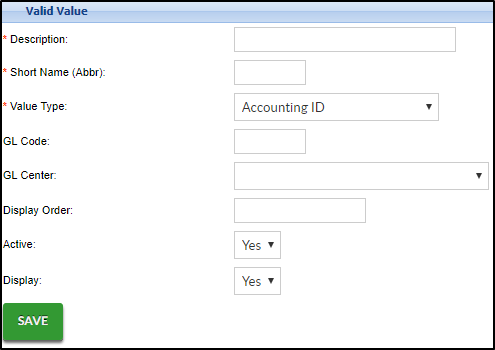
- Description – enter the name of the Document Type
- Short Name (abbv.) – enter an abbreviation of the name
- Value Type – select Document Type - Student from the drop-down menu
- GL Code - enter the general ledger code, if applicable
- Display Order – enter the number to display, if the document should be the first in the list, enter 1
- Document Type – choose the document format from the drop-down (PDF, Word, etc.)
- Active
- Yes – the document should be active
- No – the document should not be active
- Display
- Yes - display the document type for selection
- No - do not show this document type as an option
- Click Save
- A confirmation message will appear at the top of the page. The added type can now be selected from the Document Type drop-down menu