From the Family > Lead Management screen, new leads can be added. Leads are potential families that are interested in signing up for programs or events. Leads can be added manually from the admin side, or through a lead page that is setup by Procare and added by a client to their website.
Adding a New Lead
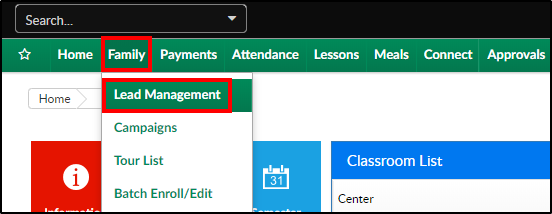
- Click Family, then select Lead Management
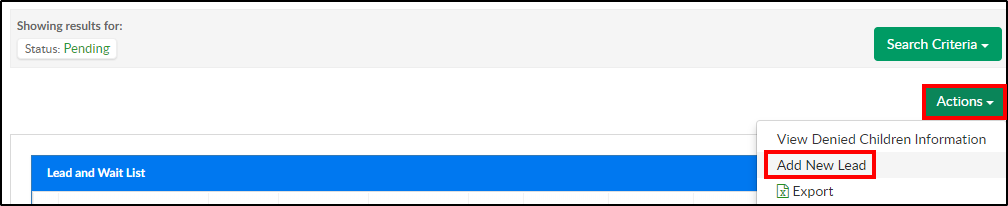
- Click Actions, then select Add New Lead
- Complete any necessary information in the Lead Entry Information
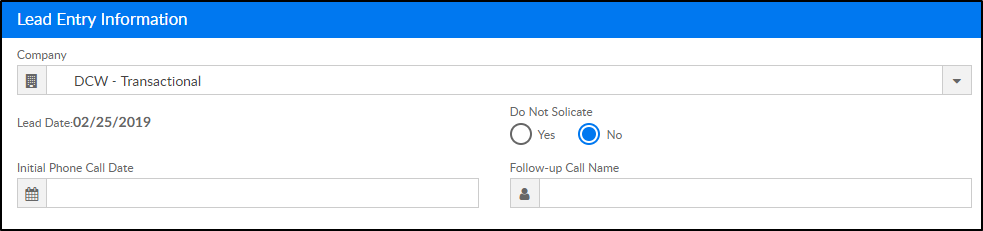
- Company - select the center the student is interested in attending
- Lead Date - this will be filled in with today's date
- Do Not Solicit
- Yes - select yes if the contact should be called/followed up with
- No - select no if the contact should not be called or contacted
- Initial Phone Call Date - select the of the first phone/interest from the calendar
- Follow-Up Call Name - enter the name of the contact that initiated interest
- Enter required information for Guardian 1. If applicable, enter guardian 2 information. Please Note: not all fields are required; required fields are marked with a red asterisk
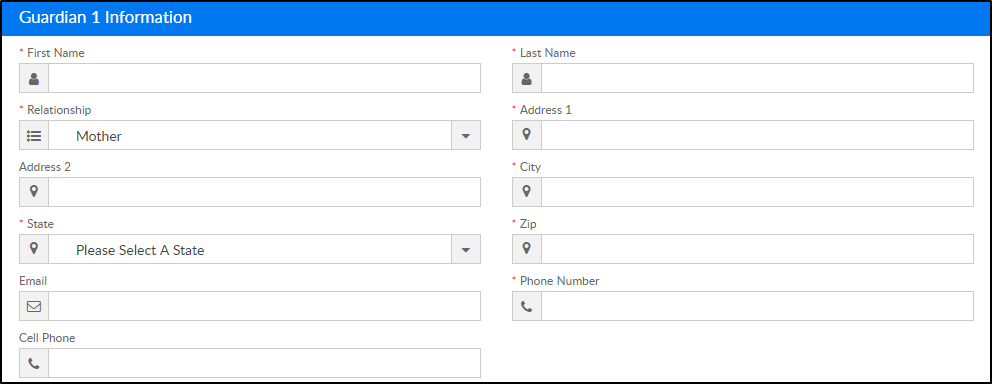
- *First Name - enter the first name of the guardian
- *Last Name - enter the last name of the guardian
- *Relationship - select the relationship to the student(s)
- *Address 1 - enter the guardian's address
- Address 2 - enter more address detail, if applicable
- *City - enter the city
- *State - enter the state of the guardian
- *Zip - enter the zip code
- Email - enter the email of the guardian
- *Phone Number - enter the phone number of the guardian
- Cell Phone - enter the cell phone number of the guardian
- Enter the student(s) information in sections Child 1-4
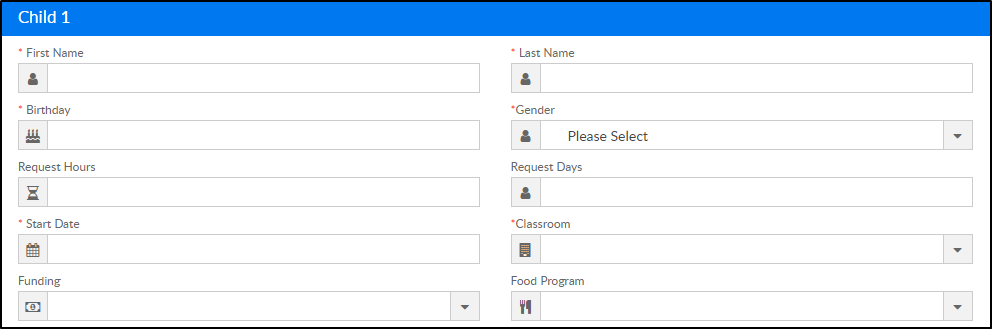
- *First Name - enter the student's first name
- *Last Name enter the student's last name
- *Birthday - enter the student's birthday
- *Gender - select the student's gender
- Request hours - enter the number of hours requesting care
- Request Days - enter the days care is being requested
- *Start Date - select the student's start date from the calendar
- *Classroom - select the classroom to attend
- Funding - enter if the student will require sponsorship/assistance
- Food Program - select the food program option (Free, Paid, Reduced) for CACFP
- Extra Information

- *Hear About Us - select the correct option (setup in Valid Values under Hear About Us)
- Hear About Us Other - if the correct option above is not available, enter the information here
- Reason for leaving other daycare - enter the reason the student(s) left the previous daycare
- Quoted Rate - the rate/fees the family was quoted
- Previous Center's Fees - if the student(s) was at a previous center, enter their fees
- Mailing Date - select the date the family was mailed
- Material Mailing Date - select the date the family was mailed material, if applicable
- Comments - enter any comments
- Follow up Notes - enter additional follow-up notes
- Click Save. The Lead Entry Information form will reload with additional sections (Activities and Calendar Events)


