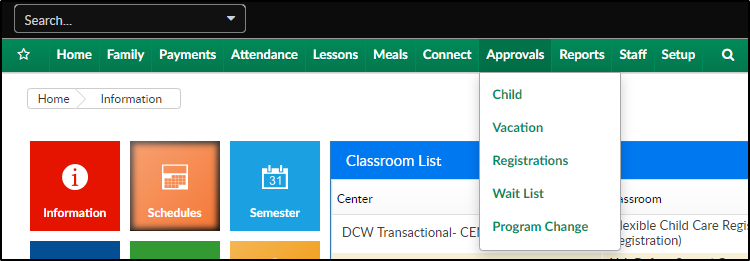
When first logging into the system, the initial screen that will display is the Home > Information page. From this page, users are able to see basic information within the tile area and complete the following tasks: approve registrations, view/approve schedule/program requests, add families, and run billing. At any time users can return to this page by clicking Home on the menu bar, then selecting Information.
At the very top of the screen you will see the menu bar, this bar will display as you navigate through the system. To the left you will see a search bubble. In the search bubble you can enter a student's first or last name, parent's first or last name, family name, family ID, or child ID. When you start typing, results will begin to display. At least three characters must be entered for results to display.

Searching
When viewing the search results, the parent/guardian results will display in white. When clicking on a parent's name, the system will be directed to the family's financial screen. The students that match the search criteria will display in yellow, when selecting a student, the system will be directed to the child screen in the family's record. Only active families will display when using this search feature.

Navigating Between Sites
In the top right corner, the center or business level name of the selected site will display. If the user has access to multiple sites, to navigate between sites, click the center name.

Then select the center from the Center List section

Account Menu
The last icon on the black bar is the user icon. When clicking this icon, the following options will display:
- The name of the user logged in
- My Account - displays username, first/last name, email address, and password
- Cirrus Support - only displays for DCW/SCW employees
- Help - clicking the Help link will open Knowledge Owl, which houses the help documentation
- Logout - log out of the system

Menu Bar Options
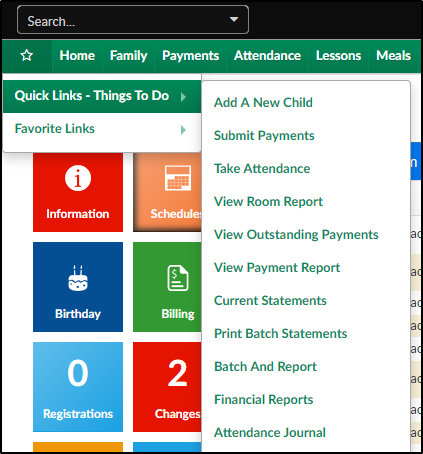
The star icon contains Quick Links and Favorite Links

The following options can be found in the Quick Links - Things to Do menu:

- Add A New Child - a shortcut to add a new family to the system
- Submit Payments - links to the Payment > Journal page to receipt payments
- Take Attendance - allows a user to take or edit attendance from the Attendance > Entry page
- View Room Report - a shortcut to the Reports > Room/Program page where student, family, and staff reports can be accessed
- Rosters & Sign In Sheets
- Staff and Child Attendance Sheets
- Health & Allergy Reports
- Staff Details
- View Outstanding Payments - a shortcut to the Payments > Outstanding page
- View Payment Report - a shortcut to the Payments > Payments screen, here users can view payments that have received with in a particular time frame, search by payment method and pull reporting of results
- Current Statements - Creates a PDF version of current statements that can be accessed by selecting the Print Batch Statements link
- Print Batch Statements - Allows users to create and access PDF statements
- Batch and Report - Users are able to batch payments together to match what has been sent to the bank or received on a bank statement
- Financial Reports - a shortcut to the Reports > Financial screen where financial reports can be created
- Revenue Reports
- Accounts Receivable Reports
- General Ledger Posting Reports
- Attendance Journal - a shortcut to the Attendance > Attendance Journal page, all check ins/outs can be viewed for a period of time. This page will also display any errors that may have occurred
The next option allows users to select their own favorites for quick and easy access. To add a favorite, click the star icon, then hover over Favorite Links. Select the Add New Favorite option and select the favorites.

When each header is selected, the available pages will display. For an overview of documentation on each tab, select the System Walk Through option to the left. Each main menu option has its own page and will provide additional detail.
