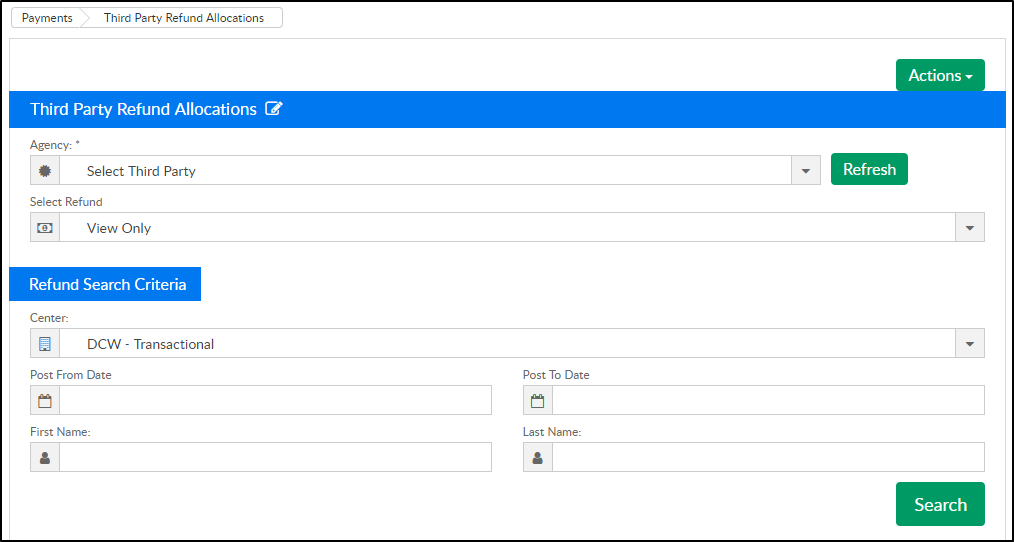
There are multiple steps involved in a third party refund. This article will cover the first step. The next step is on the Payments > Third Party Refund Allocation screen.
Users can view pending refunds (refunds that have not yet been allocated), as well as create new refunds.
Creating a Refund
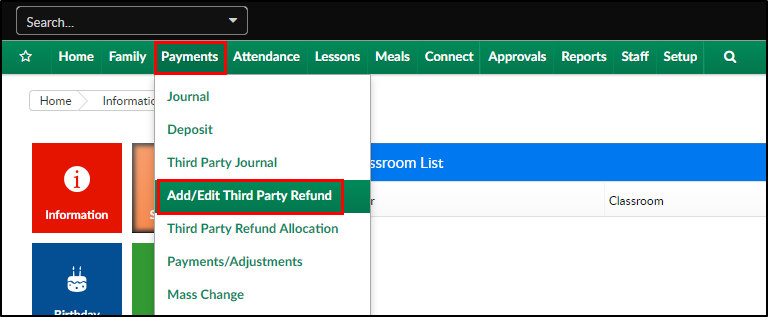
- Click Payments, then select Add/Edit Third Party Refund
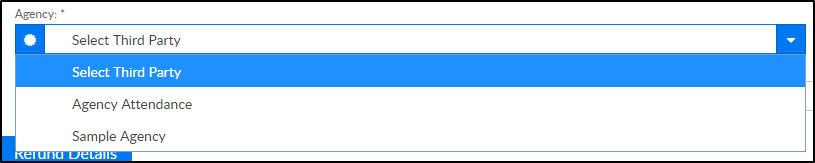
- Select the agency from the Agency drop-down
- Complete the Refund Details section
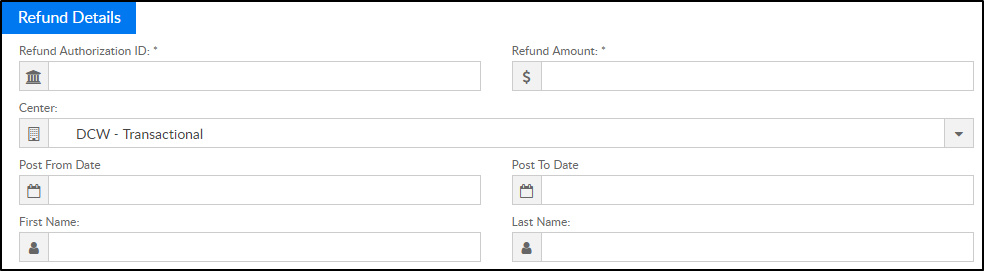
- *Refund Authorization ID - enter the authorization number
- *Refund Amount - enter the amount of the refund
- Center - select the center from the drop-down
- *Post From/To Date - enter the post dates
- First/Last name - enter the first and last name of the student
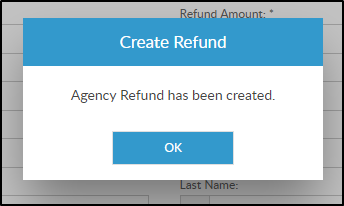
- Click OK on the confirmation popup
- The user will automatically be directed to the Payments > Third Party Refund Allocations screen