There are several ways attendance can be added to the system. The data will sync to the server, so reporting will always be up to date.
- Parents checking kids in/out by pin with the InSite Check-In application on a tablet
- Staff/Admins checking kids in/out with the InSite Classroom application on a tablet
- Staff/Admins checking kids in/out through the teacher portal (https://connect.schoolcareworks.com/login.jsp or https://family.daycareworks.com/login.jsp)
- Staff/Admins checking kids in/out through the admin side of the site on the attendance > entry page (https://daycareworks.com/cg/secure_login.jsp or https://www.schoolcareworks.com/cg/secure_login.jsp)
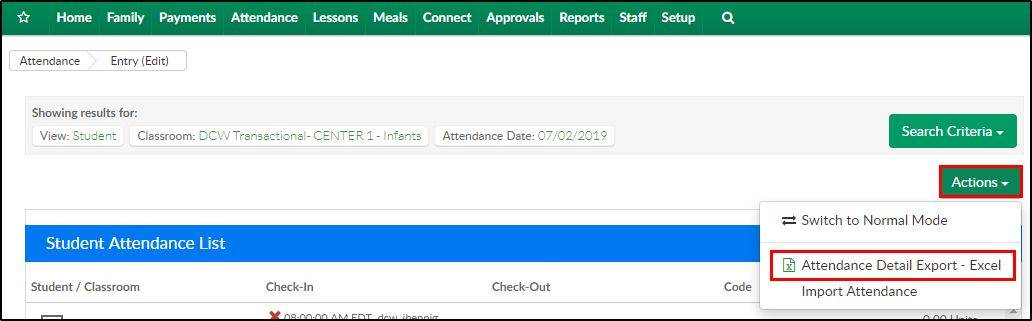
Once attendance is in the system, any edits can be made by going to the attendance > entry screen. Please Note: make sure you are in edit mode by clicking Actions, then select Switch to Edit Mode

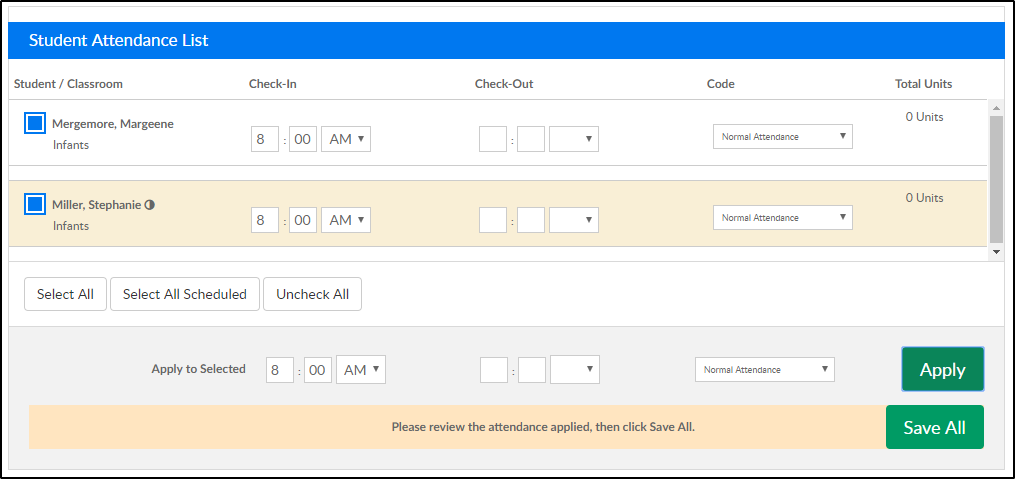
From the edit mode screen you can delete attendance by selecting the red x above a record:

Change the time a child was checked in/out by clicking into the field editing the time then press tab

If time is being entered or changed, click into the field, then press tab. The screen will auto-save for you!
You can also mass check in/out children by selecting the box icon next to each child's name-

In the Apply to Selected section, enter the check in and/or check out times, select the attendance code from the drop-down, then click Apply. Please Note: students can only be checked in or out in the past, no FUTURE times.

The time will be added to the selected student's records, then press Save All.
To pull a report that displays the day's attendance go to actions and select Attendance Detail Export- Excel
Additional reports can be pulled for a particular date range, child, classroom, etc. by navigating to Reports > Room/Program.