The Staff > Create Schedule screen will allow admin level users to create schedules for staff for specific classrooms/programs. This is part of the overall scheduling process for staff. There are settings for how many weeks can be adjusted on the setup > system config, Extended Config screen.
Pre-Work
In order to utilize this process, verify the below items have been setup within the system-
- Home > Hours- center hours must be current, for each day select the from and to time the center will operate.
- Staff must be setup under Staff > Staff list, be sure each staff member is associated to a specific site.
- For each role that will access labor planning options Activity IDs: 394, 395, 1059 must be set to All Permissions.
- Go to Staff > Staff Availability to setup times staff can be scheduled.
Create Schedules
After availability is in the system, the next step is to create schedules. To navigate to the correct screen go to the Staff menu and select Create Schedules.

Once the page loads, School, Classroom and Time Period can be selected. To copy a prior schedule to the current week select the Copy Schedule button. To copy the remaining classrooms, select Copy All Classrooms.

At the top of the schedule area the name of the room will display. Active center hours will display in white, hours the center is closed will display as gray on the scheduling grid.
- On the very left most column the hour that is being scheduled for will display the room’s student : teacher ratio (this is set at the room level).
- Under each day's column for each time's row the number of staff already scheduled will display in the add icon.
- Under the Add icon E: will display the expected (scheduled number of students) the H: will display this historical count of students (based on standard deviation of data).
To add a teacher to the room select the +Add button in line with the time and day that is being scheduled.
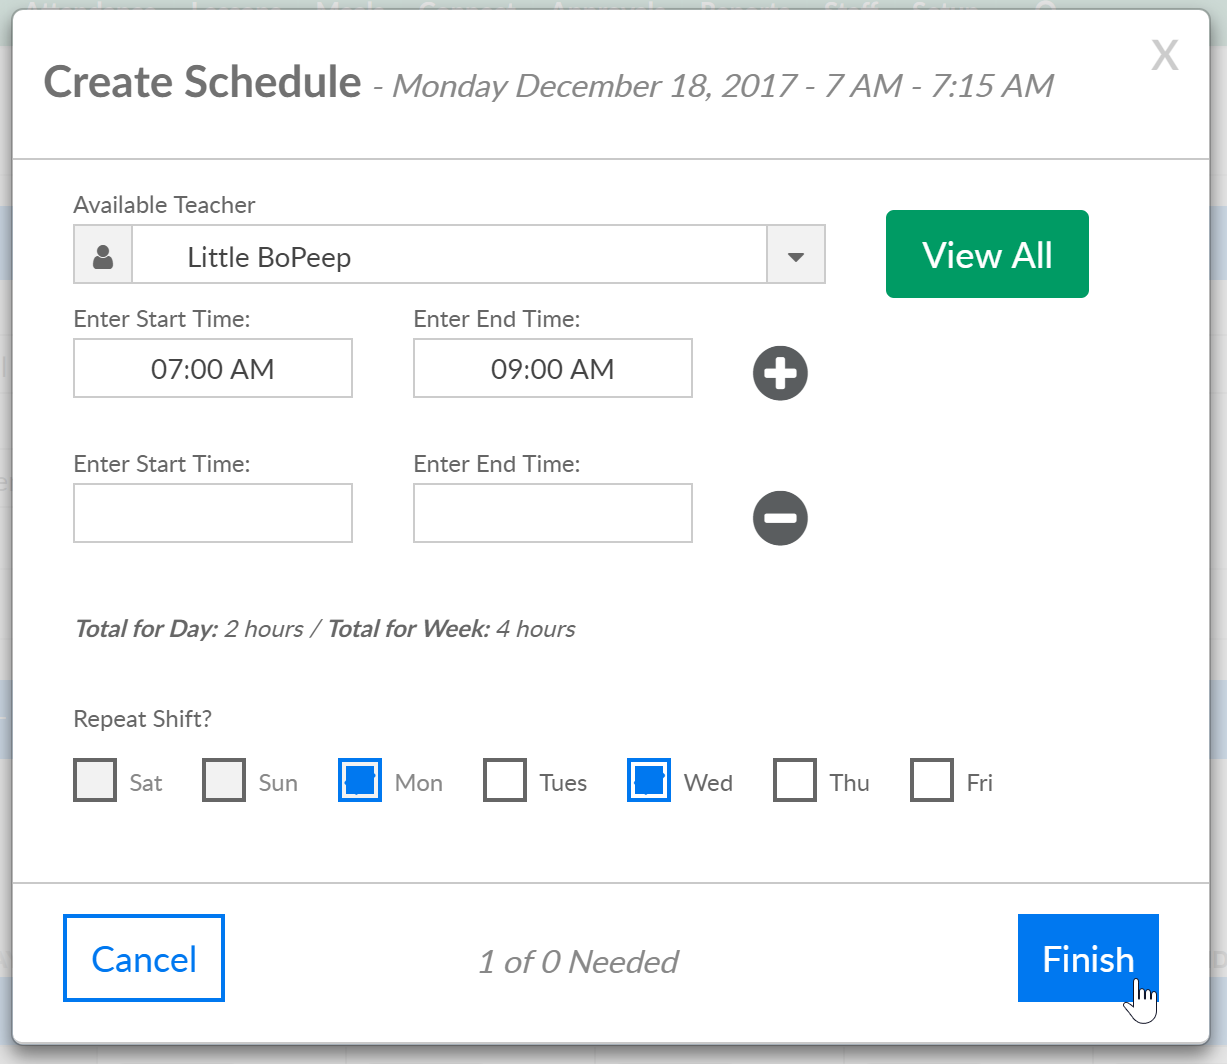
The create schedule box will open and display the time range that is being scheduled for.
Enter/Select:
- Available Teacher- teachers with availability will display as a default for the day and time that is being scheduled. To view ALL teachers regardless of schedule select the View All button.
- When a teacher has been selected, times that have been added for the teacher when they are available will display in white, when the teacher is not available the time will display as gray. Teachers can be scheduled for times they have not been marked as available.
- Teachers can only be scheduled for one classroom per time period. This means that you can only add a schedule for 7 AM on 12/18 in one classroom. If the teacher will be moving around or helping to satisfy ratio- the teacher can be moved from the admin side of the site or from the InSite Classroom application throughout the day. The schedule displays expectation.
- Enter Start Time- the time the staff will begin in the room.
- Enter End Time- the time the staff will leave the room.
- Press the + button to add another schedule for the staff member in the same room, for the same week for the same days
- Total Hours for the Day and Week will display as detail is updated.

Once schedule detail has been added, select the finish button. As staff is added to the room the target hours, expected hours and scheduled hours will update based on entered data.
If the Staff member was not scheduled a confirmation box will display, press OK to continue or cancel to exit and make changes.

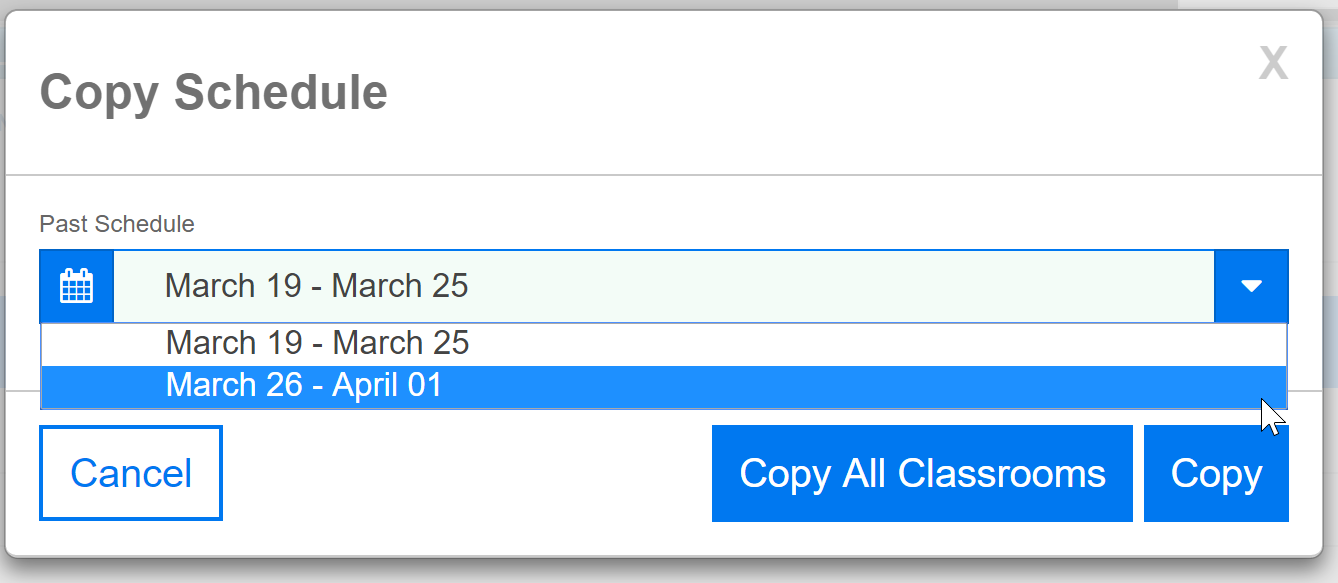
Once a schedule has been set for a particular room for one week, that schedule can be copied to additional weeks by selecting copy schedule. (The number of available weeks to schedule for is controlled by going to setup > system config, Extended Configuration.)
Select Copy Schedule from the Actions menu-

Select a particular week from the drop-down menu and then select either Copy All Classrooms (to copy all classroom schedules for the selected week) or Copy (to copy only your current classroom’s schedule for the selected week).

Once all rooms have been scheduled the next step is to preview the schedule by going to Staff > Preview Schedule.