Adding a schedule to a center allows a user the ability to add holidays to the center’s operating schedule. These schedules display when a center is open or closed. Users can also choose whether families will be charged for these days or not.
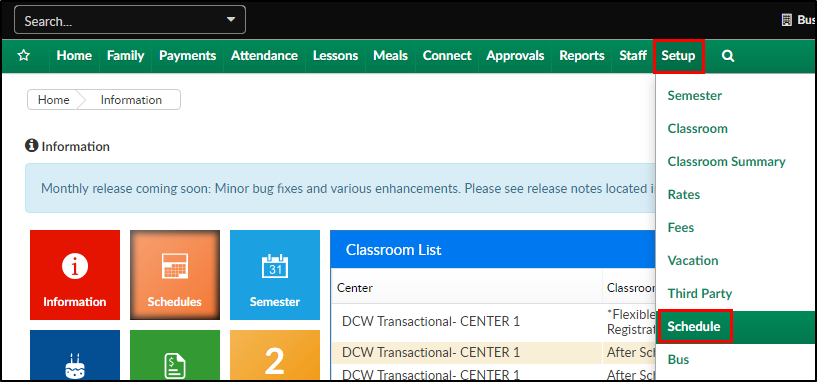
Add Events/Holidays To Schedule
- Click Setup, then select Schedule
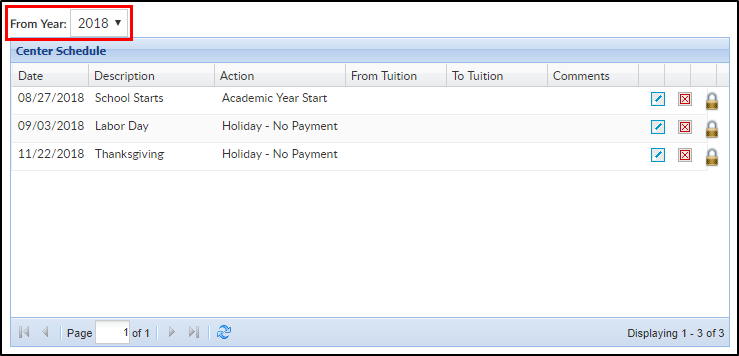
- To view current events/holidays setup, select the year above the Center Schedule section
- In the Yearly Center Schedule section, complete the necessary information
- Item Date - enter the date the schedule will take place on
- Description - enter the name of the schedule even
- Action - select the scheduled activity from the drop-down
- Holiday – No Payment - use this option if the center will be closed due to a holiday. Students with an assigned schedule for the day will not be charged
- Holiday – Payment - use this option if the center will be closed due to a holiday. Students with an assigned schedule for the day will still be charged for the day
- Holiday - Payment - Non Third Party
- Emergency Close – No Payment - use this option if the center will be closed due to an emergency. Students with an assigned schedule for the day will not be charged
- Emergency Close – Payment - use this option if the center will be closed due to an emergency. Students with an assigned schedule for the day will still be charged for the day
- Academic Year Start - use this option to setup the date a center-wide registration will start. The center-wide registration must be setup for this date to function
- Summer Start - use this option to record when summer starts
- Non Academic Day - use this option to add a non-academic day to the schedule (i.e. field trips)
- All Day - use this option to add a full academic day
- Early Dismissal - use this option to record days with early dismissal
- Change Tuition - use this option if the center will be open for the day, but students will be changed from one tuition rate to another for that day only. After that date, the student will return to their previous rate. This allows administrators the ability to close a center for a half day and only charge children a half-day rate
- From Tuition - if Change Tuition was selected in the Action drop-down, select the rate the students will be coming from
- To Tuition - if a From Tuition was selected, choose the new rate for the students from the To Tuition drop-down
- Comments - enter any additional information for the schedule
- Click Save


Adding Restrictions
If classrooms/programs need to be excluded from the schedule, follow the steps below
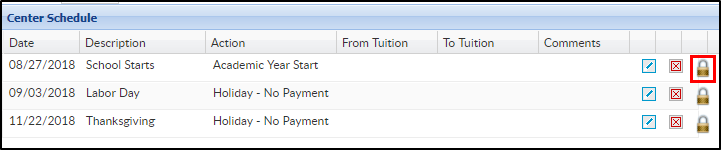
- Navigate to the Center Schedule section
- Locate the day to add restrictions
- Click the edit icon

- In the Schedule Exclude popup, place a check-mark next to the classrooms to exclude from the scheduled day
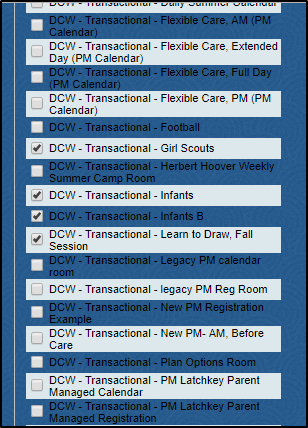
- Click Save


View/Edit Authorization
To allow the scheduled day to only apply to specific centers or states, follow the steps below:
- Navigate to the Center Schedule section
- Locate the day to add restrictions
- Click the view/edit authorization icon
- Select the Center, State, Brand, Division, District, if applicable
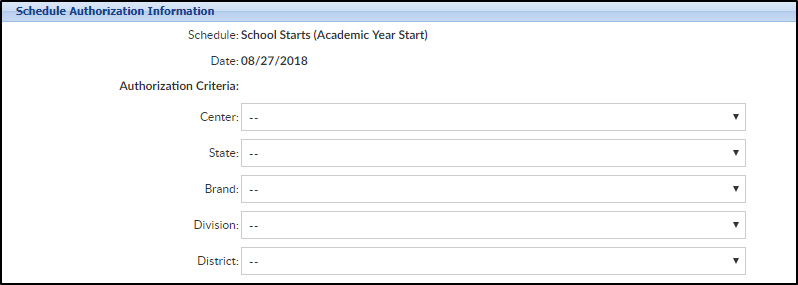
- Click Save

